Kitchen Remodel Ideas New England Homes Love: Space, Storage & Style
Plan smart: map work zones, confirm clearances, and align layouts to existing utilities. Maximize storage with Shaker cabinets, full-extension soft-close hardware, toe-kick drawers, and organized pantries. Choose durable surfaces—quartzite or engineered quartz, soapstone accents—and keep a restrained palette. Standardize hardware in brushed nickel or matte black, and use LED retrofit lighting, induction, and panel-ready appliances for discreet efficiency. Preserve charm with weathered wood and New England stone while controlling costs with phased upgrades. You’ll pick up practical specifics next.
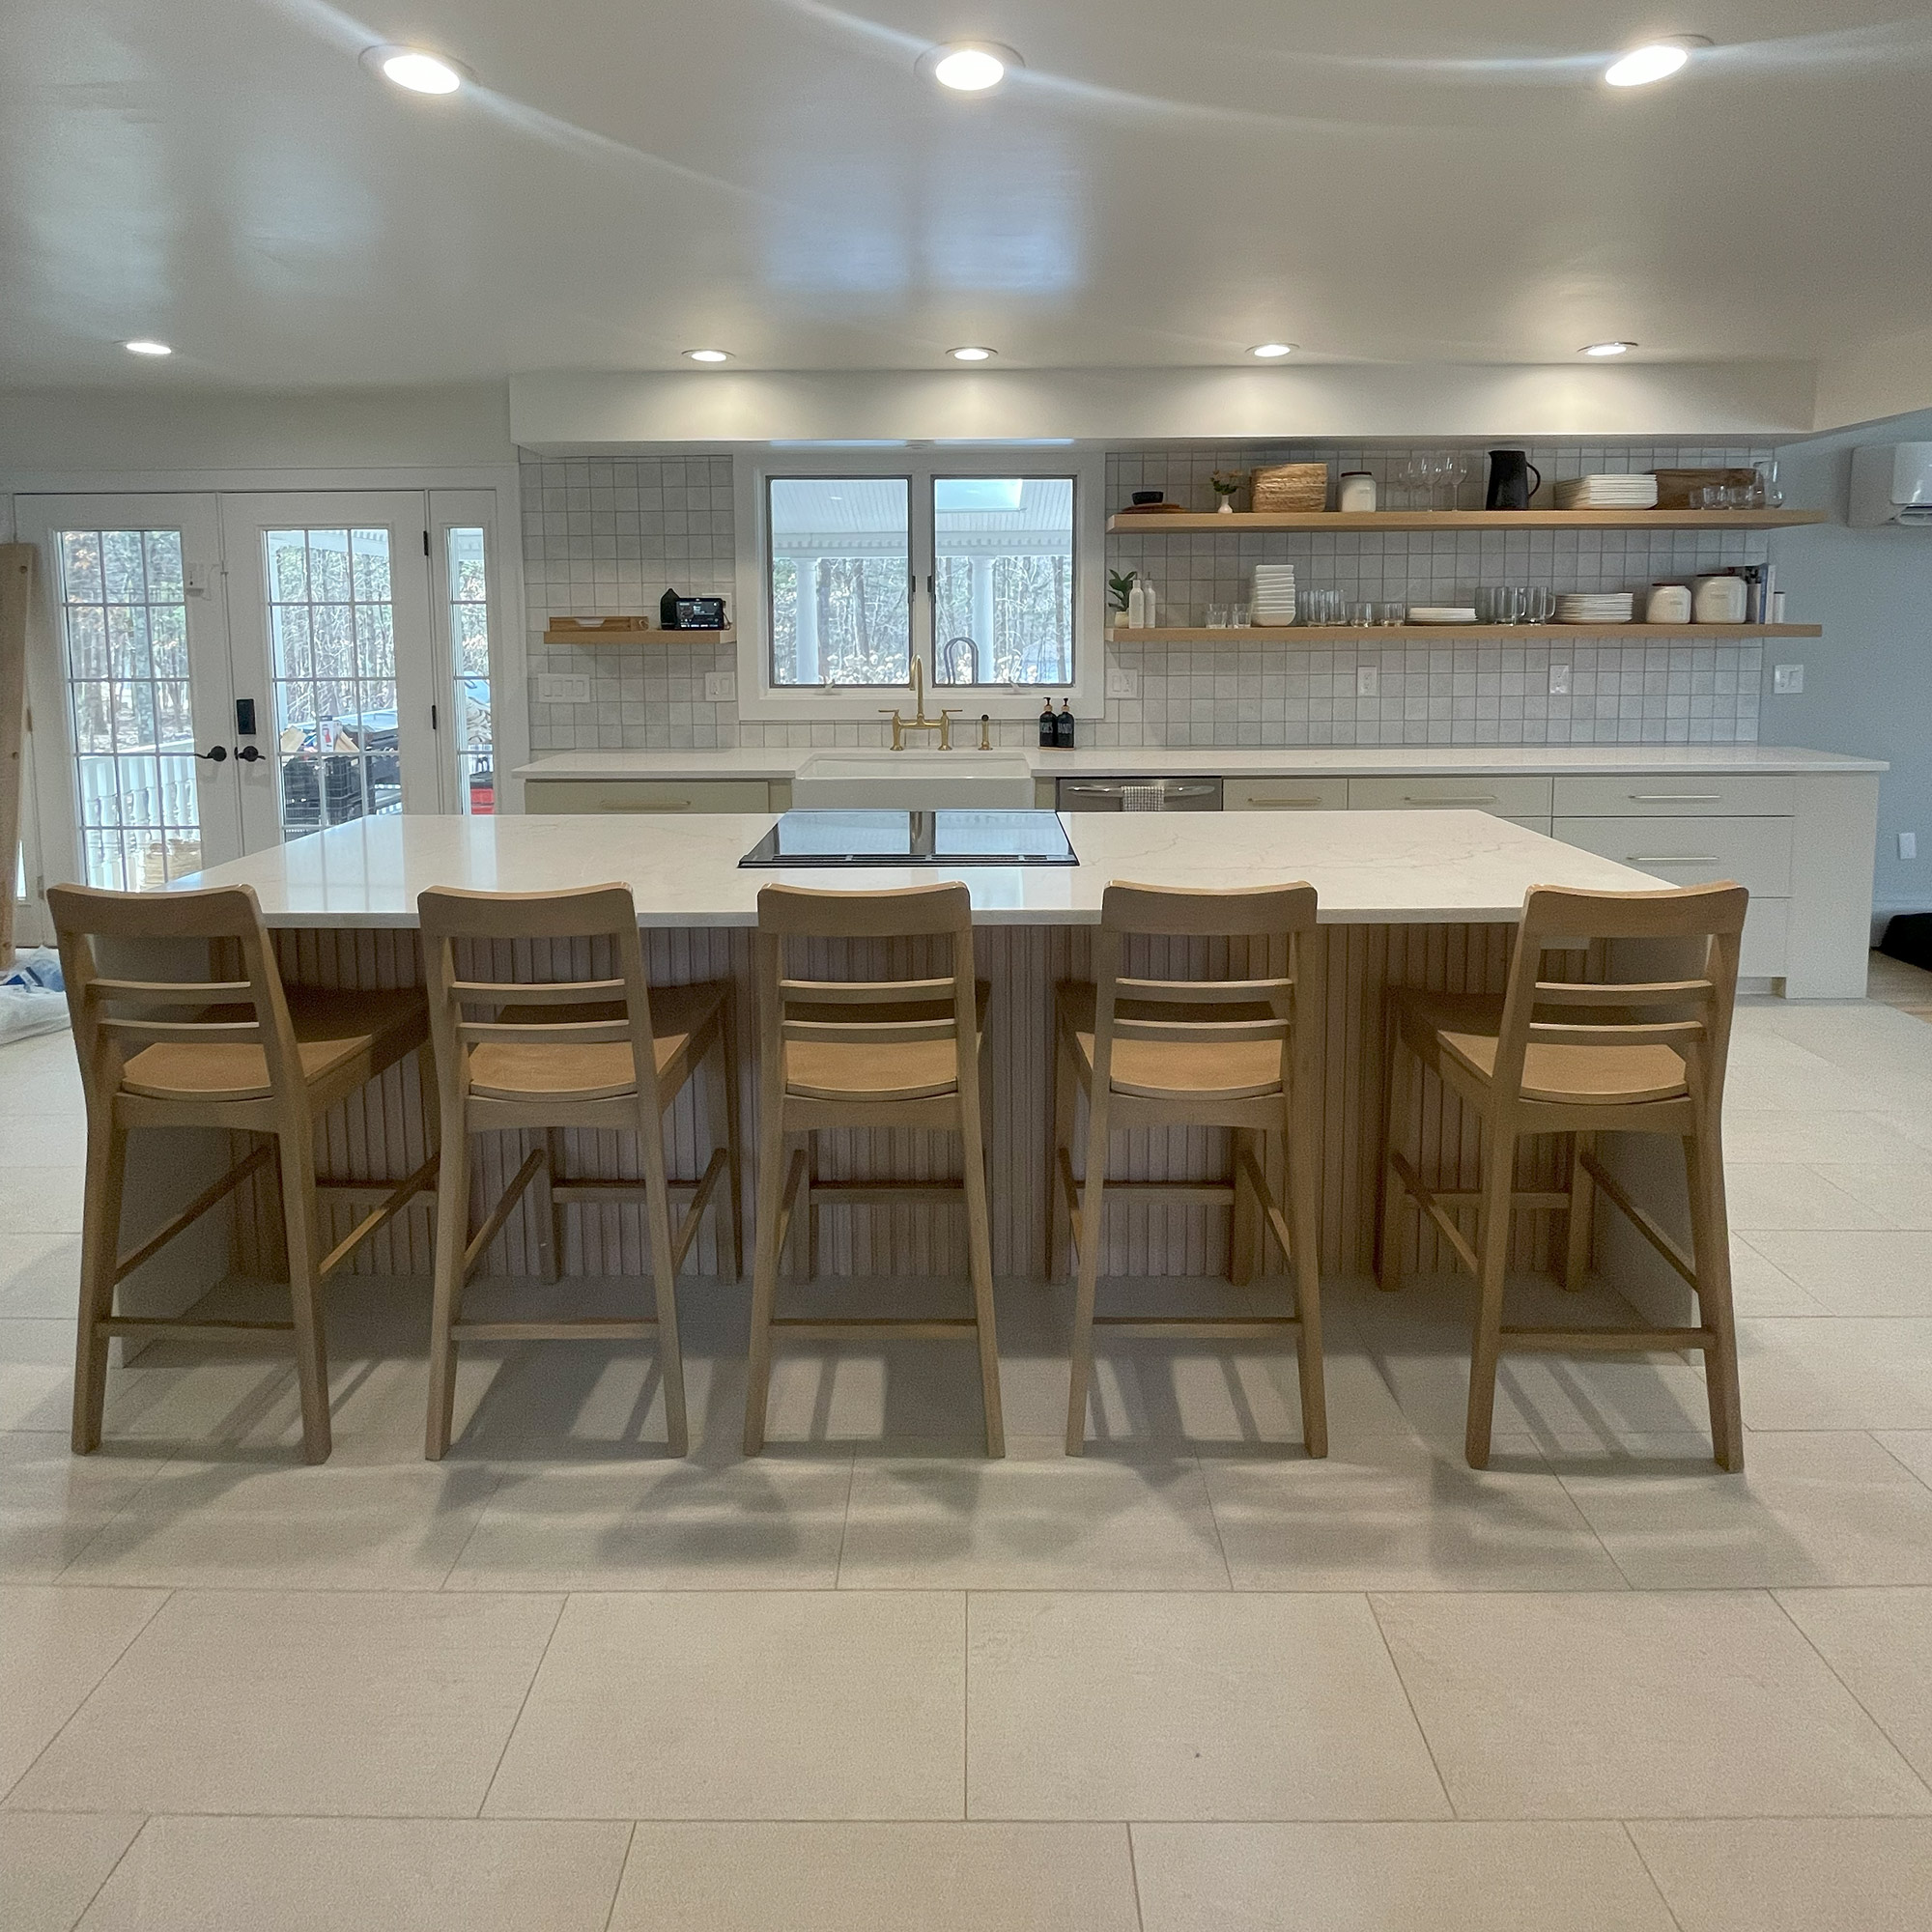
Space Planning for Historic New England Kitchens
Even with sloped ceilings, narrow ells, and irregular trim lines, you can rework a historic New England kitchen by mapping clear work zones and circulation paths before touching finishes. Start with a measured survey: document wall plumb, floor pitch, window heights, and door swings. Model the kitchen layout at 1:20 to test triangle efficiency, aisle widths (42–48 inches), and landing zones at sinks and ranges. Align task zones with existing utilities to control costs, then reroute selectively where performance gains justify the spend.
Preserve historic charm by keeping sightlines to original casings and hearths, but rationalize geometry using shallow bump-outs, angled toe-kicks, and custom filler panels. Specify compact appliances, counter-depth refrigeration, and an induction range to shrink clearances. Use layered lighting—linear under-cabinet, pendants, and dimmable ambient—to reinforce zones and circulation.
Storage Solutions That Work as Hard as You Do
While the footprint stays tight, you can squeeze serious capacity from every inch by pairing custom interiors with pragmatic hardware. Specify full-extension, soft-close slides, 110° hinges, and integrated dividers to control clutter. Choose clever cabinetry with toe-kick drawers, vertical tray slots, and blind-corner pullouts that expose every cubic inch. Add multifunctional islands with drop zones, power grommets, and under-counter refrigeration to consolidate prep and storage without growing the plan.
- Audit volume: map pantry needs by container size, frequency, and weight to assign ideal zones and hardware ratings.
- Standardize heights: set shelf increments (32mm system) for adjustable, future-proof organization.
- Retrofit smart: deploy pull-out pantries and swing-out organizers before moving walls—high impact, low spend.
- Integrate utilities: dedicate charging, compost, and recycling stations to eliminate countertop sprawl.
Shaker Cabinetry, Painted Wood, and Timeless Finishes
You can specify classic Shaker door profiles for clean lines that work with any layout and hinge system. Choose painted maple for stability and a smooth finish or painted oak for visible grain and better dent resistance at a similar cost. Pair them with timeless hardware finishes—brushed nickel, matte black, or satin brass—for durability, easy sourcing, and long-term resale appeal.
Classic Shaker Door Profiles
Although trends shift, classic Shaker door profiles deliver clean geometry, easy maintenance, and wide finish versatility—ideal if you want longevity without overspending. You’ll get a streamlined Shaker style that plays well with modern hardware, integrated lighting, and smart storage. Specify door materials precisely: stable cores, durable face veneers, and crisp inside edges that resist chipping under daily use.
- Choose a 2.25″–3″ frame width to balance shadow lines with maximum cabinet opening, improving access and airflow.
- Select a 3/8″ or 1/4″ recessed panel to reduce weight on soft-close hinges and keep reveals consistent.
- Opt for micro-bevel edge breaks (0.5–1.0 mm) to prevent paint fracture while keeping lines sharp.
- Use catalyzed finishes and sealed end-grain on rails/stiles to minimize moisture creep, critical in coastal humidity.
Painted Maple or Oak
Even on a tight budget, painted maple or oak delivers a durable, timeless Shaker look with predictable performance. You achieve a tight grain in maple for a glass-smooth painted cabinetry surface and stable door rails; oak’s open grain adds a subtle texture that reads modern under satin coatings. Specify factory-applied catalyzed enamel for high abrasion resistance and consistent color.
Choose maple when you want ultra-clean lines and minimal telegraphing; choose oak finishes when you want tactile depth without sacrificing longevity. For cost control, use oak frames with maple panels, or paint-grade maple on visible elevations and melamine interiors. Opt for full-overlay Shaker with 3/4-inch frames, 1/2-inch plywood boxes, and soft-close hinges to maximize stability. Pre-prime, sand between coats, and finish at 20–30 sheen for easy maintenance.
Timeless Hardware Finishes
While trends swing, a tight palette of hardware finishes keeps Shaker cabinetry and painted wood looking current for decades. You’ll get the most longevity by standardizing metals and profiles, then scaling quality where touchpoints matter. Pair vintage knobs with modern handles to balance heritage and ergonomics, and specify finishes that resist corrosion in coastal New England.
- Choose finishes: brushed nickel, polished nickel, unlacquered brass, or matte black. Limit to one primary, one accent to reduce visual noise.
- Specify substrates: solid brass for doors (high-touch), zinc or stainless for drawers to control cost without sacrificing durability.
- Match hinge and latch finishes to pulls; align sheen (satin vs. polished) to avoid micro-contrast.
- Future-proof: select common center-to-center sizes (128mm/160mm) so you can swap modern handles or vintage knobs later without patching.
Natural Stone, Durable Surfaces, and Weathered Accents
Prioritize timeless New England stone for hearths or islands where compression strength and thermal mass matter, then specify quartzite or engineered quartz on worktops for stain, scratch, and heat resistance with low maintenance. If the budget’s tight, use quartz on primary runs and reserve the premium slab for a focal zone to control cost per square foot. Add weathered wood accents—floating shelves, toe-kicks, or a range hood wrap—with sealed finishes to deliver patina without compromising cleanability.
Timeless New England Stone
If you want a kitchen that ages gracefully, anchor it with New England–inspired stone: think honed granite, soapstone, or slate for worktops, paired with fieldstone or ledger-stone accents. You’ll get resilient prep zones, thermal mass for steady temps, and stone textures that telegraph historical significance without sacrificing performance. Specify matte finishes to conceal etching, ease edges for chip resistance, and seal joints for easy maintenance. Source regional stone to reduce freight and carbon emissions.
- Choose materials: soapstone for heat tolerance, honed granite for abrasion resistance, slate for slip-resistant flooring transitions.
- Engineer thickness: 3 cm tops reduce substructure costs; add steel flat bars at spans.
- Detail drainage grooves at sinks; radius cutouts to prevent stress cracks.
- Use reclaimed curbstone for toe-kicks, thresholding, and weathered accents.
Quartzite and Quartz Durability
Stone gave you heritage and heft; now compare quartzite and engineered quartz for everyday abuse and budget control. If you want real stone performance, quartzite benefits include Mohs ~7 hardness, strong scratch resistance, and excellent heat tolerance for hot pans. It needs sealing to block oils and wine, but annual upkeep is minimal if you choose a low-porosity slab and a solvent-based sealer.
Engineered quartz trades natural variation for predictability. It resists stains without sealing, excels at impact resistance, and offers tight color control for modern schemes. Prioritize quartz maintenance by using simple, non-abrasive cleaners, avoiding harsh solvents, and using trivets to prevent resin discoloration from high heat.
Budget check: quartzite costs more to fabricate (harder to cut), while quartz typically reduces install hours and waste.
Weathered Wood Accents
Looking to warm up all that stone and steel without sacrificing durability? Integrate weathered wood accents that deliver weathered charm and rustic elegance without compromising performance. Choose engineered or thermally modified wood for panels, shelves, and trim; both resist moisture swings common in New England kitchens. Specify hardwax oils or two-part commercial finishes for wipe-clean maintenance and stain resistance.
- Select species strategically: white oak (closed grain, dimensional stability), ash (impact resistant), or reclaimed heart pine (budget-friendly character).
- Use wood where abuse is lower: island ends, floating shelves, hood wraps, and drawer fronts—keep prep zones in stone or quartz.
- Detail edges with micro-bevels to hide wear; rip boards with varied widths to create a visual rhythm.
- Balance tones: cool quartzite plus mid-tone oak yields calibrated contrast.
Coastal Calm Meets Classic Colonial Style
While you honor your Colonial home’s symmetry and millwork, introduce coastal calm through a restrained palette and practical material swaps. Specify coastal colors—chalky whites, fog gray, and sea-glass blue—in scrubbable, low-VOC paints to protect colonial charm without yellowing. Replace high-maintenance marble with honed quartz in drifted tones; it resists etching and pairs with inset cabinet doors. Upgrade pine floors to rift-and-quartered white oak with a matte waterborne finish; it minimizes movement in humid summers. Select beadboard or shiplap only at end panels and island backs to control cost and visual noise. Choose unlacquered brass or brushed nickel hardware in simple, historic profiles. For the backsplash, use glazed ceramic in elongated subways; specify a 1/16-inch grout joint and epoxy grout for added longevity.
Modern Conveniences That Preserve Character
You’ve set the coastal-classic palette; now, integrate upgrades that work hard without reading as new. Specify kitchen technology that hides in plain sight: induction under a beadboard-clad island, panel-ready refrigeration, and Wi‑Fi dimmers mapped to historic-style sconces. Retain charm by restoring vintage appliances with modern guts—reinsulated ovens, new thermostats, and induction-compatible burners—to cut energy use while preserving silhouettes.
- Prioritize invisible systems: soft-close, full-extension slides; under-cabinet plugmold to keep backsplash clean; in-drawer charging with GFCI protection.
- Choose retrofit lighting: 2700K-3000K LED lamps in candelabra bases, high CRI, dim-to-warm drivers for period fixtures.
- Integrate smart ventilation: ECM motors, auto make-up air,and lined wood hoods to match millwork.
- Protect the envelope: water-leak sensors, shutoff valves, and toe-kick grilles for discreet radiant heat.
Balance cost with phased installs and rebates.
Conclusion
Funny coincidence—you’re reading this just as your kitchen’s quirks are costing you time and square inches. Now you can fix that. You’ll map traffic flow, right-size work zones, and add task lighting. You’ll stretch storage with toe-kick drawers, rollout trays, and stacked Shaker uppers. You’ll choose durable quartzite, sealed soapstone, and marine-grade paints that suit New England weather. You’ll integrate paneled appliances and induction without losing character. Best part? You’ll phase upgrades to match your budget.