Ice Dams 101: Prevention and Roof Protection for New England Homes
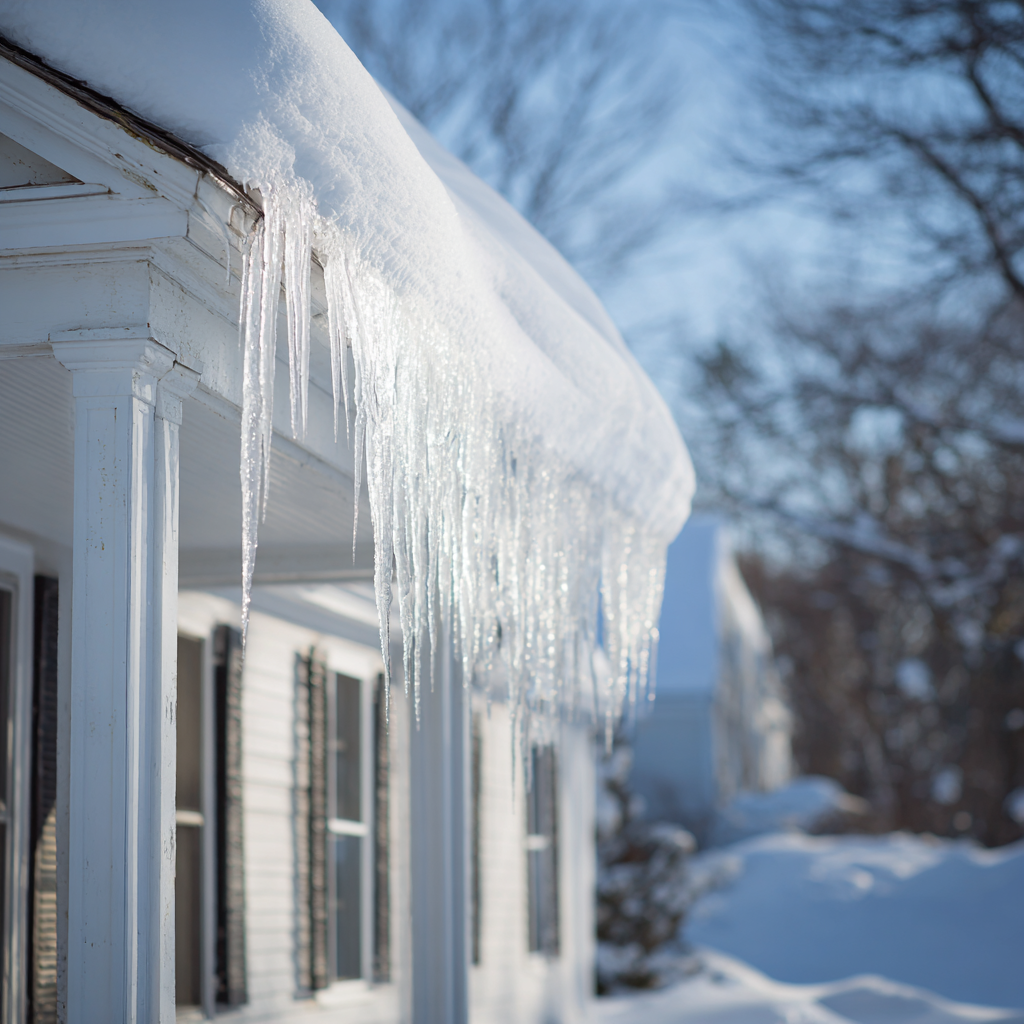
Ice dams form when heat leaking from your attic warms the upper roof deck above 32°F while cold overhangs stay frozen, so meltwater refreezes at the eaves. You’ll spot early warnings such as damp ceiling corners, frosty attic nails, a sharp melt line, and icicles in specific gutter sections. Cut risk by air-sealing attic bypasses, insulating to R-49–R-60, and balancing soffit-to-ridge ventilation (about 50/50 intake/exhaust). Next, you’ll see exact steps and upgrade triggers.
Why Ice Dams Form on New England Roofs
Why do ice dams show up so often on New England roofs? You get them when heat loss warms the roof deck above 32°F while eaves stay below freezing. Snow melts upslope, then refreezes at the cold overhang, building a ridge that blocks Roof drainage. New England conditions amplify the gradient: deep snow loads (often 20–40 psf) insulate shingles, while long cold snaps keep soffits and gutters frozen. You also drive the problem with indoor stack effect: warm, moist air leaks through top plates, recessed lights, and attic hatches, spiking local deck temperature. Complex rooflines—valleys, dormers, skylights—increase the area of low-slope zones where meltwater slows, so Ice dams form faster and persist longer.
Early Ice Dam Signs (Inside and Outside)
When should you suspect an ice dam is starting—before it turns into a leak? Track early signs after a thaw-freeze cycle when daytime roof-surface temps hover near 32°F and nights drop below. Your interior indicators often appear first: damp halos at ceiling corners, blistered paint near exterior walls, musty attic air, or elevated humidity localized to the eaves. In the attic, you’ll see darkened sheathing, compressed insulation, or frost on nails where heat escapes. Outside cues show up in roof observations: a sharp melt line above the soffit, a growing ice ridge at the gutter edge, icicles forming only at one section, or refrozen drips on fascia. Also note the thinner snowpack above heated rooms.
What to Do Right Now if an Ice Dam Forms
If an ice dam forms, you’ll reduce the risk fastest by lowering meltwater production (by reducing attic heat loss) and opening a controlled drainage path using low-impact methods like calcium chloride-filled socks—never rock salt or open-flame heaters. You should keep removal forces minimal (no chipping with sharp tools) and focus on metrics: rising indoor humidity, active dripping, and expanding staining mean water is backing up behind the dam. You’ll call a pro immediately if you see ceiling sagging, electrical proximity, persistent leaks after temporary melting, or a dam thicker than a few inches along multiple feet of eave.
Safe Temporary Melting Steps
How quickly you act matters: once you spot an ice dam (a ridge of ice at the eave with water backing up under shingles), treat it as an active leak risk and start controlled, low-impact melting steps that won’t fracture roofing materials or force water deeper into the assembly. First, clear loose snow 3–6 feet above the dam with a roof rake to reduce snow melt feeding it and limit attic condensation-driven refreezing. Next, place calcium-chloride deicing socks perpendicular to the dam to cut vertical channels; avoid rock salt, which accelerates metal corrosion and shingle granule loss. Keep the melt path draining off the edge, not under shingles. Inside, capture drips, dry wet insulation, and run a dehumidifier to keep RH under 50%. Avoid chopping or pressure-washing.
When To Call Pros
Controlled melting and interior moisture control can buy you time, but some ice dams exceed what DIY measures can safely handle. Treat these triggers as an ice dam warning: repeated ceiling drips, bubbling paint, or staining that grows hour-to-hour; gutters deforming under load; or icicles thicker than 2–3 inches spanning multiple bays. If indoor RH stays above ~40% at 70°F and you can’t stabilize it within 4–6 hours, moisture will continue to feed the freeze line.
Call pros when you see active leakage, electrical fixtures near wet areas, or you can’t maintain safe roof access. Prioritize contractor timing: book before the next thaw/refreeze cycle, and request steam removal, infrared moisture mapping, and targeted air-sealing recommendations.
Air Sealing and Insulation to Stop Ice Dams
To stop ice dams, you’ve got to cut heat loss into the attic that warms the roof deck and refreezes at the eaves. You start by locating key air leaks (around plumbing stacks, recessed lights, chimneys, and attic hatches) and sealing attic bypasses with foam, caulk, and fire-rated materials where required. Then you boost attic insulation to a climate-appropriate R-value while keeping soffit-to-ridge ventilation paths clear, so the roof stays cold and snowmelt stays predictable.
Find Key Air Leaks
In winter, where does the heat that feeds an ice dam actually escape? It slips through hidden air leaks that short-circuit your thermal boundary and warm the roof deck above freezing. Your best move is fast, quantified detection: schedule a blower-door test (target ≤3 ACH50 for many New England homes) and pair it with infrared thermography to map temperature anomalies in real time. You can also run a DIY pressure check: on a windy day, use a smoke pencil at attic hatches, recessed lights, plumbing stacks, chimney chases, and top-plate seams. Log each location, leak intensity, and the depth of nearby insulation. Prioritize clustered leaks over isolated pinholes; they drive convective loops that amplify meltwater and refreeze cycles. Document findings before any retrofit scope or bids.
Seal Attic Bypasses
Where do those mapped hot spots actually come from? They’re usually attic bypasses: direct air pathways from conditioned space to the roof deck that move heat by convection, not just conduction. Even small openings can drive disproportionate losses because stack pressure increases with height, pulling warm, moist air upward.
Seal the big bypasses first: top plates, plumbing stacks, chimney chases, recessed lights rated non-IC/AT, bath-fan housings, and open soffit-to-attic transitions. Use fire-rated sealant or sheet metal at combustibles, then high-quality foam or gasketed covers elsewhere. Verify with a blower-door “zone pressure” test; you’re aiming to cut pathways for attic leakage, not just patch insulation gaps. Keep ventilation paths functional by maintaining attic baffles at every rafter bay, so air channels stay open.
Boost Attic Insulation
Air sealing knocks down convective heat loss, but you won’t keep the roof deck cold unless you also raise the attic’s R-value to slow conductive flow through the ceiling plane. In New England, target at least R-49 to R-60 at the attic floor; that typically means 16–20 inches of loose-fill cellulose or fiberglass, verified with depth markers. Prioritize uniform coverage over joists to reduce thermal bridging and maintain consistent melt-freeze behavior at eaves. Choose products with stable insulation chemistry: borate-treated cellulose resists mold, while low-dust fiberglass maintains loft when kept dry. Keep soffit-to-ridge ventilation paths clear with baffles so added insulation doesn’t block airflow. Monitor attic condensation risk by keeping interior RH controlled and ensuring insulation stays above the dew point.
Roof Ventilation for Ice Dam Prevention (Intake + Exhaust)
How do you stop a New England roof deck from warming up enough to melt snow that later refreezes at the eaves? You engineer balanced ventilation: cold air in at soffits (intake) and warm, moist air out at the ridge (exhaust) so the sheathing tracks outdoor temperature. Target code-level net free vent area of 1:150 (or 1:300 with proper vapor control), split roughly 50/50 between intake and exhaust; don’t starve intake, or exhaust vents short-circuit. Baffles preserve an air channel above insulation and prevent wind-washing. Avoid ice-dam myths and venting misconceptions: gable vents alone rarely clear the lower deck, and “more exhaust” can depressurize the attic and pull conditioned air upward. Use continuous soffit + ridge systems for uniform airflow.
Safe Snow Removal Methods That Reduce Ice Dams
Balanced intake/exhaust ventilation keeps the roof deck colder, but during big New England snow events, you can still exceed the roof’s “cold roof” capacity and feed ice dams at the eaves. Targeted snow removal lowers the heat load by reducing insulation-like snow depth; aim to clear the lower 3–6 feet above gutters first, where refreezing concentrates. Use a roof rake with a telescoping handle and non-marring wheels, and pull snow in small lifts to avoid loss of shingle granules. Keep a 2–3 inch snow layer as a protective buffer; you’re reducing mass, not scraping to the bare roof. For roof access, stay on the ground when possible; if you must climb, use a stabilizer and tie off to a rated anchor point.
Ice Dam Protection Upgrades: and When to Call a Pro
Where should you invest first when ice dams keep showing up even after careful snow raking? Start with upgrades that change the heat-and-melt math: you’re trying to keep the roof deck at or below 32°F so meltwater can’t refreeze at eaves. Prioritize innovations that deliver measurable gains in airflow, insulation, and waterproofing.
- Air-seal the attic plane (top plates, chases, can lights) and verify with a blower-door test; target ≤3 ACH50 for tight homes.
- Boost insulation to R-49–R-60 and add baffles to maintain 1–2 inches of soffit-to-ridge ventilation.
- Upgrade roof protection: install a self-adhered ice-and-water membrane at eaves/valleys.
Call a pro if you see ceiling staining, recurring leaks, or complex rooflines.
Conclusion
If you ignore ice dams, they’ll bully your roof like a hydraulic jack, forcing meltwater under shingles and into ceilings. You’ve already learned the playbook: spot the early signals, act fast, and stop heat loss with tight air sealing and higher R-values. Balance intake and exhaust ventilation to keep roof-deck temps uniform. Pull snow safely before it refreezes. If dams keep returning, upgrade membranes or call a pro before repairs explode.
Frequently Asked Questions
Here are 10 highly practical, SEO-optimized FAQs written in an accessible, authoritative tone. They are tailored specifically to the structural mechanics, prevention strategies, and winter realities of dealing with ice dams on New England homes.
1. What exactly is an ice dam, and how does it form on a roof?
An ice dam is a thick ridge of solid ice that forms along the eaves (the lower edges) of a roof. It is caused by a structural temperature imbalance:
- Warm indoor air escapes into your attic, heating up the upper sections of your roof deck.
- This heat melts the snow from underneath, causing water to run down the slope beneath the snowpack.
- When that water reaches the cold, uninsulated edge of the roof overhanging your exterior walls, it hits freezing temperatures again and instantly turns into a block of solid ice.
2. Why are ice dams considered a major threat to my home’s interior walls?
The ice ridge itself isn’t what damages your home—it’s the water trapped behind it. As more snow melts up high, the water runs down and pools behind the solid ice dam. Because shingles are designed like overlapping fish scales to shed flowing water downward, they cannot handle standing, stagnant water. The trapped pool backs up right under the shingles, leaking through the wood decking and soaking into your attic insulation, ceiling drywall, and interior wall framing.
3. Can I just hack away at an ice dam with a hammer or shovel to remove it?
No, never do this. Hacking at solid ice with a hammer, axe, or sharp shovel will permanently ruin your roof. In freezing temperatures, asphalt shingles become incredibly brittle. A single misplaced strike can easily crack the shingles, slice through underlying waterproofing layers, puncture the wood deck, or rip your gutters clean off the house.
4. What is the safest way to remove an active ice dam in the middle of winter?
The industry gold standard for active ice dam removal is high-pressure low-temperature steam. Specialized professionals use professional steaming machines that slice through the ice cleanly using heat rather than physical force, allowing the ice blocks to slide safely off the roof without harming the fragile shingles underneath.
A quick DIY stopgap: If you are waiting for a professional steamer, you can fill a pair of old pantyhose with calcium chloride ice melt (never use standard rock salt, which corrodes roofing nails and kills landscaping) and lay it vertically across the ice dam. This will melt a natural drainage channel through the ice so the backed-up water can escape.
5. What is an “ice and water shield,” and how does it protect my roof?
An ice and water shield is a heavy-duty, self-adhering waterproofing membrane made of rubberized asphalt. During a roof replacement, code requires installing this membrane directly onto the bare wood deck, starting at the eave edge and extending at least 2 feet inside the interior wall line. If an ice dam forms and water backs up, this membrane seals tightly around every single roofing nail, acting as a bulletproof waterproof barrier that stops water from leaking into your house.
6. Why is attic insulation the most effective long-term defense against ice dams?
To stop ice dams permanently, you have to keep your roof deck cold. Thick, code-compliant attic insulation (like blown-in cellulose or spray foam) acts as a physical barrier that keeps the expensive heat you pay for inside your living spaces where it belongs, rather than letting it bleed upward into the roof structure.
7. What role does attic ventilation play in preventing ice dams?
Insulation locks the heat down, but ventilation flushes out any stray warmth that escapes. A high-performance roof ventilation system pairs soffit vents (under the roof overhang) with a ridge vent (at the very peak of the roof). This creates a continuous natural draft of cold outdoor air that sweeps directly beneath the roof deck, keeping the entire roof structure uniform in temperature and preventing snow from melting prematurely.
8. What is a “soffit baffle,” and why is it critical for attic airflow?
A soffit baffle (or insulation rafter vent) is a plastic or foam channel installed between your roof rafters right where the roof meets the exterior wall. It keeps your thick attic insulation from packing tightly into the eaves and completely choking off your soffit vents. The baffle ensures a clear, unobstructed pathway for cold outdoor air to stream into your attic space.
9. Are roof heating cables a good permanent solution for ice dams?
Roof heating cables (or heat tape) are a Band-Aid fix, not a permanent cure. They use electricity to melt small zig-zag paths through the snow so water can escape. While helpful for homes with complex architectural flaws that cannot be easily insulated, they do not fix the underlying cause—heat loss. They carry high energy costs, can become fire hazards if damaged by heavy snow slide shifts, and look unappealing on a high-end roof layout.
10. How does a “roof rake” help prevent ice dams during heavy snowstorms?
A roof rake is a long, extendable aluminum pole with a flat paddle blade on the end. Standing safely on the ground, you can use it to gently pull the bottom 3 to 4 feet of fresh snow off your roof eaves after a major New England blizzard. By removing the snow from the coldest zone of the roof, you eliminate the raw material needed to form an ice dam in the first place. Always leave a thin layer of snow behind rather than scraping the shingles bare to avoid friction damage.