Open Concept vs. Traditional Kitchens: Which Layout Is Right for Your Remodel?
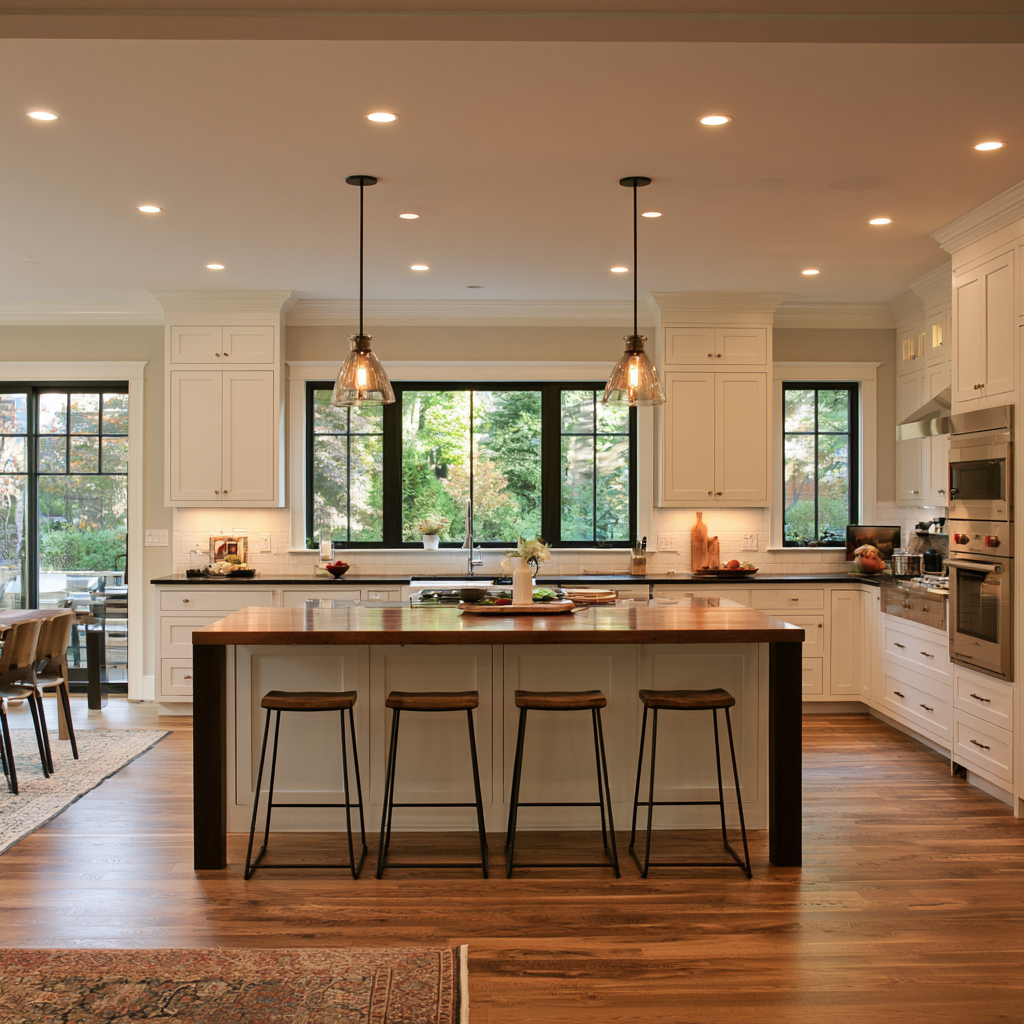
Choose an open-concept kitchen if you want to face guests, extend sightlines, and pull daylight deeper, but you’ll need stricter circulation: keep 36-inch walkways minimum (42–48 inches for two-cook traffic), protect door swings, and place beverage/serving zones outside the work triangle. Choose traditional if you want calmer visuals, better noise and odor control, and privacy for messy prep or calls. Plan proper hood ducting and make-up air either way. Next, compare hybrids and real-world remodel costs.
Open Concept vs. Traditional: Choose in 60 Seconds
Wondering which layout fits your remodel without creating traffic jams or code headaches? In 60 seconds, map your daily path: prep, cook, clean, serve. If you crave sightlines, shared zones, and flexible hosting, an open concept lets you align island seating with clear 42-inch aisles and keep egress routes unobstructed. If you want containment, quieter acoustics, and tighter control of mess and odors, a traditional layout gives you defined work zones and doors that protect adjacent rooms. Check that appliance doors don’t collide and that landings flank the sink, range, and fridge. Choose the scheme that keeps the work triangle tight, circulation separate, and lighting layered for task precision. Then sketch it to scale now.
The 5 Decision Factors That Matter Most
To choose between open concept and traditional, you’ll weigh five factors that affect daily function and code-safe clearances: traffic flow and sightlines, noise/odors/privacy, budget, structure, and resale. You’ll map circulation around work zones, verify required egress and aisle widths, and plan ventilation and sound control so cooking doesn’t disrupt adjacent rooms. You’ll also confirm what walls and utilities can move, price the scope realistically, and match the layout to buyer expectations in your market.
Traffic Flow And Sightlines
Where do people actually walk—and what do they need to see—when the kitchen’s in use? Map your traffic flow from entries to fridge, sink, and cooktop, then keep that path outside the work triangle. You’ll reduce collisions and stay closer to best-practice clearances: aim for a minimum 36″ walkway, 42″ if you expect two cooks, and protect door swings so they don’t pinch the route. In open concepts, extend sightlines to kids, guests, and the range, but use an island, half wall, or glass partition to preserve privacy without blocking supervision. In traditional layouts, a cased opening can control views while maintaining access. Consider acoustics early so hard surfaces don’t amplify clatter into adjacent spaces.
Noise, Odors, And Privacy
How much sound and smell can your home absorb before the kitchen starts running the show? In an open layout, blender roar and pan sizzle travel fast, so plan noise mitigation early: specify quiet-rated appliances, add resilient flooring underlayment, and use acoustic panels or a ceiling baffle where clearances allow. Keep aisles at code-friendly widths so you don’t bunch up and amplify chatter.
For odor control, you’ll want a properly ducted, high-capture hood sized to the cooktop, plus make-up air where required. In a traditional kitchen, doors give you privacy for messy prep and conference calls, and they let ventilation work harder in a contained volume. If you still want openness, add a pocket door or glass partition to toggle privacy without blocking light.
Budget, Structure, And Resale
Once you’ve addressed noise, odors, and privacy, the next reality check is what your budget can carry, what the structure will allow, and what buyers in your market expect. Open plans often trigger budget constraints: rerouting HVAC, plumbing vents, and electrical, upgrading lighting loads, and adding engineered beams when you remove bearing walls. You’ll also need code-compliant clearances—36-inch aisles minimum, 42–48 inches for multi-cook zones—and safe landing space at appliances, so the new layout doesn’t bottleneck circulation. Traditional kitchens can reduce structural scope, letting you invest in high-performance storage, task lighting, and a tighter work triangle. For resale value, match neighborhood norms: in some markets, an open kitchen sells; in others, a defined room signals quality and order. Plan accordingly.
Daily Life Fit: Kids, Pets, WFH, and Cooking Habits
Often, the right kitchen layout comes down to what your house has to support every day—kids circling the island, pets underfoot, video calls at the table, and weeknight cooking that needs clear, code-compliant circulation. To match your daily routine, design around reach, sightlines, and safe clearances, not trends. Prioritize pet safety with appliance landing zones and gated pinch points. If you WFH nearby, control acoustics and backdrops with smart partitions or a pocket door without shrinking work triangles. Keep prep-to-cook-to-clean sequences tight, with 15-inch landings at key appliances and uninterrupted counter runs for staging.
Consider:
- 42–48 inches between runs for two-pass traffic.
- Rounded island corners for kid impacts.
- Induction plus child-locks.
- Task lighting with glare control.
Entertaining and Traffic Flow: Open vs. Closed Kitchens
When you host, an open kitchen keeps you connected to guests, while a closed kitchen contains noise, heat, and visual clutter behind walls and doors. You’ll want to map traffic so circulation paths don’t cut through the work zone, and you maintain safe clearances at the range, sink, and refrigerator. Compare where people queue, pass, and perch to see whether an open plan reduces bottlenecks or a traditional layout controls congestion.
Hosting And Social Interaction
How do you want people to move through your kitchen during a party—circling the island with a drink in hand or staying out of the cook zone entirely? Your layout sets the tone for hosting comfort and social interaction. Open concepts let you face guests while you prep, so conversation stays continuous and sightlines stay clean. Closed kitchens let you stage, plate, and reset without visual noise, which can feel calmer and more controlled.
Design it like a system:
- Put a beverage/serving station outside primary work aisles to reduce interruptions.
- Maintain code-clearances at doors and around islands for safe pass-by.
- Specify task lighting that separates prep from gathering zones.
- Add acoustical finishes so chatter doesn’t overpower teamwork.
Movement Patterns And Congestion
Where do bodies bottleneck once the doorbell rings and everyone drifts toward the food? In an open kitchen, you’ll often see movement patterns cut straight through the work zone, so you need clear, code-compliant aisles: about 42 inches for one cook, 48 for two, and a landing zone beside appliances. Place the island so it doesn’t pinch paths to doors, seating, or the fridge, and keep the sink, range, and prep surfaces aligned to reduce cross-traffic.
In a closed kitchen, you can control congestion points with a single entry, a pass-through, or a butler’s pantry that routes guests away from hot zones. Add a beverage station outside the primary triangle to keep flow smooth.
Mess, Noise, and Cooking Smells: What You’ll Notice
Ever notice how a great meal can leave the whole house feeling louder, messier, and more fragrant? In an open layout, your activity broadcasts to living zones, so you’ll feel spillover faster; in a traditional room, walls act like buffers. To keep things code-compliant and comfortable, you’ll design for noise management and air circulation from the start, not as afterthoughts.
- Specify a quiet-rated hood (sones) and short, straight duct runs to exhaust odors efficiently.
- Add acoustic panels, resilient flooring, or soft surfaces to damp clatter without shrinking clearances.
- Place the cooktop away from main seating sightlines to reduce visual “mess” and splatter exposure.
- Use task lighting and a defined cleanup zone, so you reset quickly between prep and serving.
Storage and Counter Space: Open vs. Traditional Kitchens
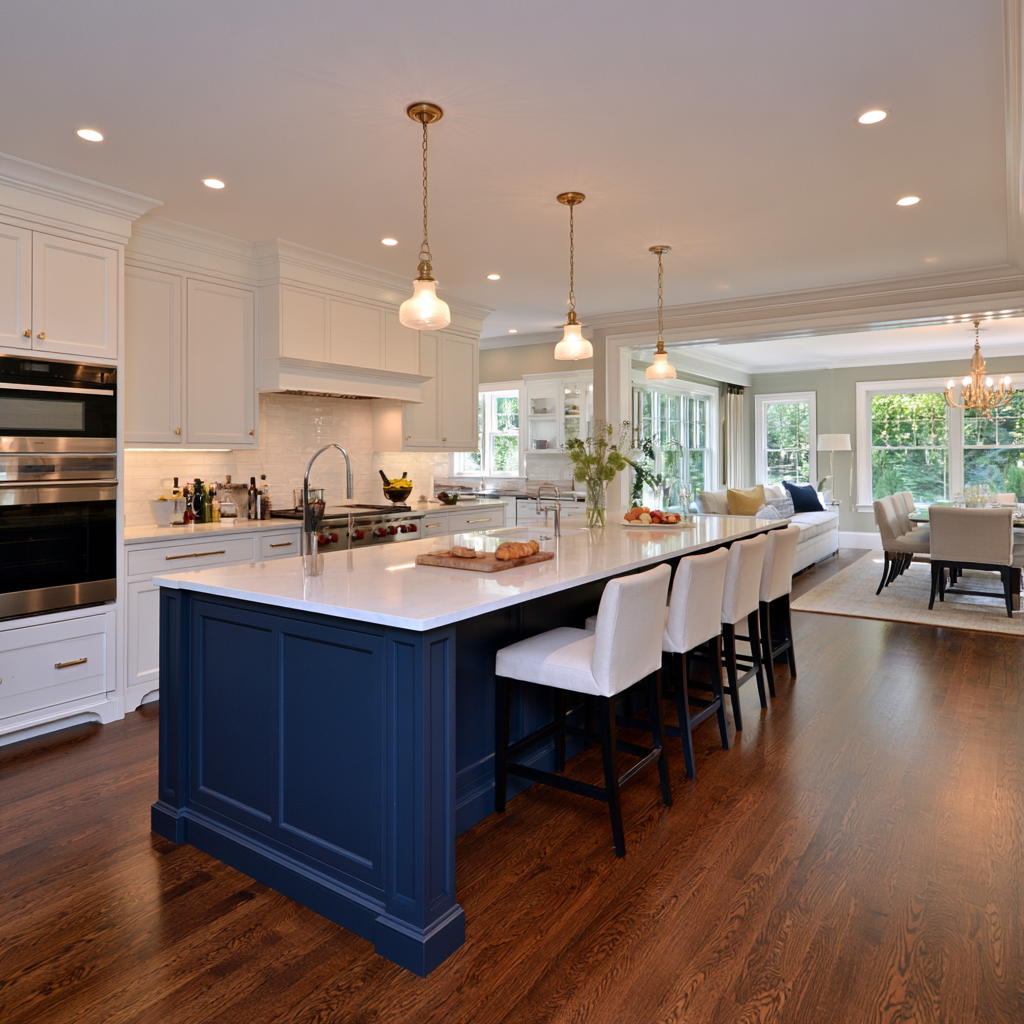
When you choose an open kitchen, you’ll typically trade some wall-cabinet footprint for sightlines, so you need to plan clearances and work zones to keep storage within easy reach. Traditional layouts often give you longer runs of countertop continuity, while open plans shift prep and landing space to an island, which changes traffic flow and ergonomic reach. You’ll want to compare pantry placement and island storage capacity, so your most-used items stay accessible without blocking required aisles or appliance clearances.
Cabinet Footprint Differences
How much cabinetry can you actually fit once you commit to an open concept? Once you pull down walls, you often lose long runs of uppers, so your cabinet footprint shifts to islands and tall units. Keep circulation code-compliant: protect 36″ minimum aisles (42″–48″ for two cooks) and plan clearances before you add storage. Standard base cabinet depth (24″ plus door/pull) still rules ergonomics; oversizing forces longer reaches and tighter walkways.
- Prioritize tall pantry cabinets to replace missing uppers.
- Use an island only if it won’t pinch landing zones.
- Concentrate drawers near prep and cook centers for fewer steps.
- Specify pull-outs and corner hardware to recover “dead” volume.
Countertop Continuity And Flow
Where your counters run—and where they break—sets the daily workflow as much as your cabinet plan. In an open concept, you’ll want long, uninterrupted landing zones beside the cooktop and sink so moves stay linear and safe; keep clearances code-friendly and corners radiused where traffic clips edges. A continuous run supports true countertop flow from prep to cook to serve, but you’ll need disciplined appliance spacing so cords, vents, and heat don’t interrupt the work surface. In a traditional kitchen, segmented counters can reduce cross-traffic and create dedicated stations, yet too many seams shorten usable landing space. When you introduce material transitions—say, quartz to stainless at the range—align thicknesses and joints so pans slide, crumbs don’t trap, and cleaning stays fast.
Pantry And Island Storage
Countertop flow only works if storage supports it, and that puts pantry capacity and island planning front and center. In open layouts, you’ll rely on an island to absorb clutter, so specify deep drawers, rollout trash, and appliance garages that keep sightlines clean. In traditional kitchens, a walk-in or tall pantry can carry more bulk, but you must protect food quality with pantry ventilation and compliant clearances.
- Keep 42″ aisles (48″ for two cooks) around the island.
- Size island seating so knees clear 12–15″ and traffic stays separate.
- Put heavy items between knee and shoulder height to reduce reach strain.
- Add dedicated zones: oils near cooktop, snacks near entry, recycling near sink.
Light and Sightlines: What Each Layout Changes
Why do light and sightlines feel so different after a kitchen remodel? In an open concept, you pull daylight deeper into the plan, reduce shadowed corners, and gain clear supervision lines to dining and living zones. You’ll still want layered task lighting that meets code, keeps work surfaces evenly lit, and avoids glare on glossy counters. Maintain required clearances at entries and around islands so circulation stays safe and intuitive.
In a traditional layout, walls frame views, control visual clutter, and let you place windows, uppers, and appliances with tighter alignment. You can aim sightlines at a focal point, protect prep zones from traffic, and tune lighting to each workstation. If “subtopic not relevant” sounds odd, treat it as a placeholder for discussion ideas during planning.
Comfort and Ventilation: Heat, A/C, and Hood Needs
How comfortable will your kitchen feel once you start cooking, and where will that heat and moisture go? In an open concept, comfort dynamics spread fast—great for conversation, tougher on adjacent zones. In a traditional layout, walls buffer temperature swings, but you’ll need dedicated exhaust and balanced make-up air to keep pressure stable and odors contained.
- Size your range hood by cooktop output, capture area, and duct run length.
- Keep ducts short, smooth, and properly terminated to reduce noise and backdraft risk.
- Plan A/C supply and return locations so airflow doesn’t disrupt hood capture.
- Maintain clearances around appliances for safe reach, maintenance access, and code-compliant heat separation.
Dial these ventilation needs early, and your kitchen stays crisp under peak loads.
Remodel Reality Check: Walls, Permits, and Total Cost
Before you fall in love with a layout, take a hard look at what it takes to build it: moving or removing walls can trigger structural engineering, electrical and plumbing reroutes, and a permit scope that affects schedule and inspections. If you’re opening the kitchen, you may need a beam, posts, or upgraded footings; that’s real money and time. Verify wall height and how it ties into your ceiling plan so ducting, lighting, and sprinkler or smoke requirements stay compliant. Rerouted circuits must meet AFCI/GFCI rules, and relocated sinks or gas lines can require pressure tests and venting changes. Budget for demolition, patching floors and ceilings, and inspection rechecks. You’ll control total cost by locking appliance locations, clearances, and ergonomic work zones early.
Hybrid Options: Half Walls, Arches, and Pocket Doors
Where do you land if you want an open feel without giving up all the boundaries? You choose hybrid options that keep sightlines flowing while defining work zones for safety, acoustics, and circulation. A half wall can cap at 42 inches to meet guard expectations when it borders a drop, and it doubles as landing space near the range. Arches widen openings without deleting structure, but you’ll verify header sizing and maintain code-required clearances. Pocket doors let you “close the box” during heavy cooking, then disappear to restore flow; just plan wall cavities and electrical runs early.
- Keep 36-inch aisles; 42+ for multi-cook.
- Maintain 15-inch landing zones.
- Protect ventilation capture paths.
- Use durable, cleanable edge details.
Frequently Asked Questions
How Does an Open Kitchen Affect Home Resale Value in My Neighborhood?
An open kitchen can boost your neighborhood value if buyers here prize sightlines, flexible entertaining, and updated flow; that’s strong open concept resale. You’ll protect value when you keep clear egress paths, maintain required separation around ranges, and plan proper ventilation. Preserve an ergonomic work triangle, add landing zones by appliances, and avoid oversized islands that pinch 42–48 inch aisles. Match finishes to local comps, too.
What Flooring Transitions Work Best Between Kitchen and Adjacent Rooms?
You’ll get the best flooring transitions by keeping surfaces flush, slip-resistant, and movement-friendly between the kitchen and adjacent rooms. Use a T-molding only when materials differ in thickness; otherwise choose a slim reducer or a flush metal edge for ADA-minded clearance. Run the same floor through for a seamless, innovative look. Align transition lines with doorways or cabinet edges, and avoid thresholds that catch toes or wheels.
Can I Keep Original Trim and Molding When Removing Kitchen Walls?
Yes—you can often keep original trim when removing walls, but you’ll need careful sequencing. Want to preserve that character without compromising flow? Start with a structural assessment and permits: if it’s load-bearing, you’ll add a beam and new headers per code. Plan for trim returns, patching, and consistent reveals at corners. Verify clearances for walkways, landing zones, and outlets so ergonomics and innovation still lead.
Which Lighting Plan Works Best With Fewer Walls and Upper Cabinets?
You’ll get the best results with a layered, zoned plan: recessed ambient LEDs on dimmers, code-rated task lighting over counters and sink, and glare-controlled pendants over the island. With minimal walls and fewer uppers, use open concept lighting plus under-shelf or integrated channel lights on open shelving. Keep fixtures aligned to work triangles and clearances, avoid shadowing at prep zones, and meet required illumination levels throughout.
How Do Open Layouts Change Appliance Placement and Electrical Outlet Needs?
In an open concept, you’ll shift appliance placement to islands and perimeter runs to protect clearances, landing zones, and safe traffic flow. You’ll need more floor or island receptacles, pop-up/under-counter outlets, and dedicated circuits for cooktop, wall ovens, fridge, and ventilation. You’ll also plan GFCI/AFCI protection, required countertop spacing, and accessible shutoffs. Keep outlets within ergonomic reach while hiding them cleanly. Add charging zones too.
Conclusion
You don’t “pick a trend”; you test a theory: open kitchens only feel better if your routine tolerates exposure—sightlines, sound, and mess—without eroding comfort. If your work zones need clear boundaries, a traditional plan can outperform by controlling traffic, odor, and noise while preserving aisle widths and safe clearances. Whichever you choose, design to code: adequate ventilation, egress paths, and ergonomic reach. Hybrid partitions often deliver the best compliance-to-livability ratio.