Remodel Budget Blueprint: Where to Save—and Where to Splurge
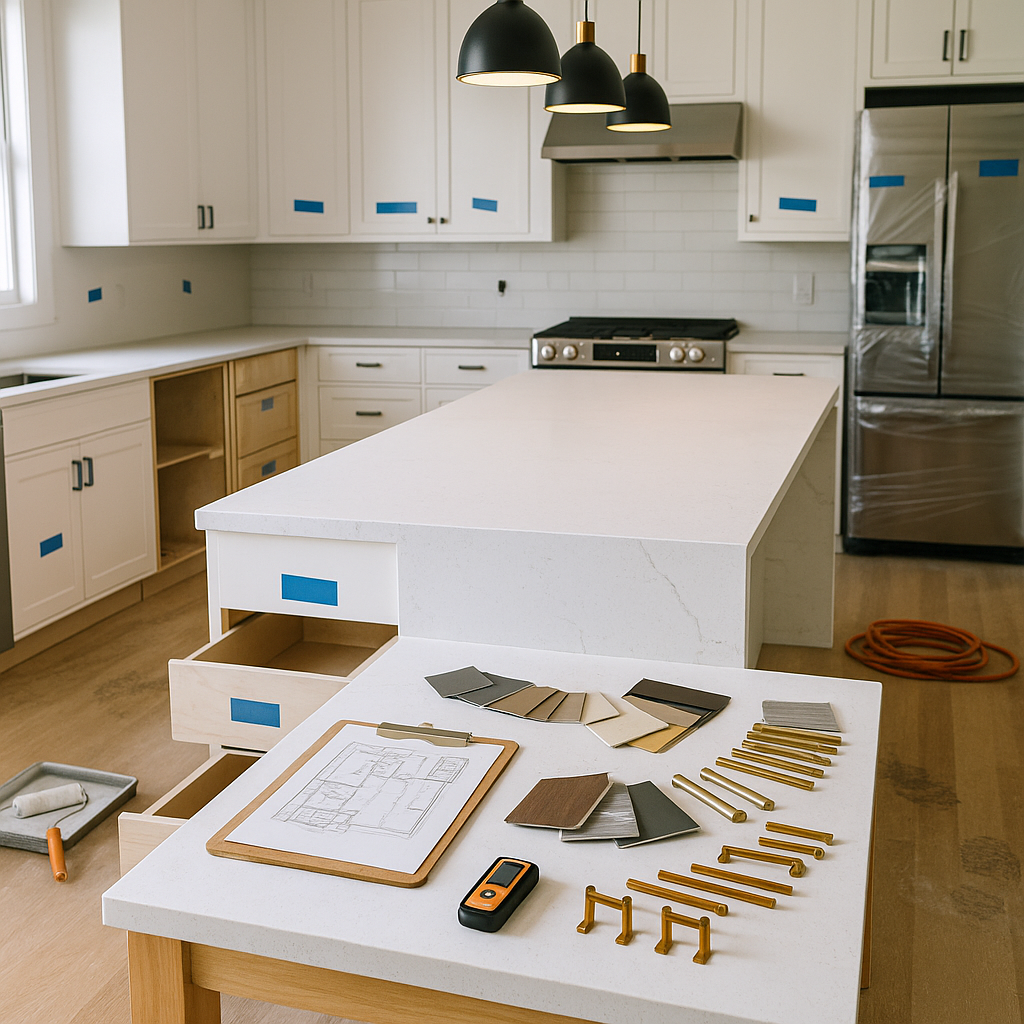
Start by ranking rooms by impact—kitchens and primary baths drive 60–80% of value. Lock scope with measurable goals, budget must-haves first, and keep a 10–20% contingency. Splurge on energy efficiency (heat pumps, triple-pane windows), premium waterproofing, and upgraded electrical; save by keeping layouts, refacing cabinets, and DIYing low-risk tasks. Itemize materials/labor, bid three contractors, and order long-lead items early. Phase work to control cash flow and tie payments to milestones. You’ll see exactly how to maximize ROI next.
Set Your Renovation Priorities and Scope
Where do you get the biggest return for every dollar? Start by ranking rooms by impact and usage: kitchens and primary baths typically drive 60–80% of perceived value gains, while entries and lighting upgrades improve first impressions at low cost. Define your renovation goals in measurable terms—e.g., increase storage by 30%, cut HVAC loads by 15%, or add a workstation without expanding the footprint. Map dependencies into a project timeline: sequence structural fixes, systems, then finishes to prevent rework. Lock scope with must-haves, nice-to-haves, and deferrables; quantify each item’s cost, lifespan, and maintenance load. Prioritize durable, low-VOC materials, LED retrofits, and smart controls that deliver ongoing savings. Validate choices with before/after energy models and space utilization metrics to guarantee every decision earns its keep.
Build a Realistic Budget and Contingency
Start by ranking scope essentials so that your budget funds must-have work before nice-to-have items. Itemize materials and labor line by line with current unit costs, vendor quotes, and timelines to lock estimates to real numbers. Then add a 10–20% contingency based on project complexity and risk factors to absorb price swings and surprises.
Prioritize Scope Essentials
Although inspiration drives your vision, your budget should steer it: define must-haves that deliver function, safety, and code compliance first, then allocate dollars by impact and cost. Start with scope clarity: list essential features that affect livability—electrical capacity, waterproofing, ventilation, structure, and accessibility. Rank each by ROI, risk reduction, and lifecycle cost. Prioritize high-risk, high-impact items over aesthetic ones.
Set a contingency of 10–15% for unknowns tied to hidden conditions; raise to 20% for older homes or structural moves. Lock decisions with decision deadlines to prevent scope creep. Use benchmarks—cost per square foot, energy payback periods, and warranty lengths—to validate priorities. Defer low-impact upgrades until core systems are stabilized. Document inclusions/exclusions so stakeholders align, and revisit priorities at each milestone to keep spending intentional.
Itemize Materials and Labor
With your must-haves ranked and scope locked, convert priorities into line items: quantify materials and labor by trade, room, and CSI division so costs aren’t guessed. Create a spreadsheet that categorizes each assembly (e.g., 06 10 00 Rough Carpentry) by takeoffs, unit costs, crew hours, and productivity rates. Pull prices from three material sourcing channels—wholesale, direct-to-consumer, and recycled—then timestamp quotes to track volatility.
Separate labor negotiation from procurement: request scoped bids with inclusions/exclusions, crew size, daily output, and overtime premiums. Compare apples-to-apples using unit rates (per square foot, linear foot, or fixture). Flag long-lead items and installation dependencies to avoid idle labor. Assign vendors to each line, attach spec sheets, and note alternates so value-engineering decisions are fast and measurable.
Add 10–20% Contingency
Set a contingency of 10–20% to cover unknowns, scope creep, and price swings, calibrated to project risk. Use 10% for straightforward cosmetic updates; push to 15–20% for structural changes, old homes, custom fabrications, or long lead times. Anchor the reserve to your itemized estimate, not the headline budget, so your buffer scales with real costs.
Run scenario tests: if materials rise 8% and labor slips two weeks, does your contingency planning still hold? Track allowances separately from your contingency to avoid masking overruns. Allocate by category—materials, labor, permits—so you can reassign funds with intent. Review weekly with your contractor and release the unused contingency last. Document every draw against unexpected expenses, and adjust forecasts in real time to protect cash flow and schedule.
What to Splurge On for Long-Term Value
When prioritizing long-term value, channel your budget to upgrades that lower lifetime costs, enhance resale appeal, and minimize maintenance. Invest in energy efficiency first: triple-pane windows (U-factor ≤0.20), heat-pump HVAC (SEER2 ≥18), and induction ranges cut utility bills 20–40% and attract data-savvy buyers. Choose durable, low-VOC finishes—porcelain slab counters, large-format tile, and factory-finished flooring—reducing replacements and service calls.
Prioritize systems you can’t easily revisit: upgraded electrical with ample circuitry, whole-home surge protection, and Cat6A wiring for robust smart-home backbones. Specify premium waterproofing in wet zones and closed-cell spray foam in rim joists to prevent rot and air leakage. Opt for luxury fixtures with metal valves and ceramic cartridges; they outlast budget hardware and maintain tactile quality that signals craftsmanship and longevity.
Smart Places to Save Without Regret
You cut costs fast by keeping the existing layout—skipping plumbing or electrical moves can trim 10–30% from project totals. Instead of replacing cabinets, doors, or tubs, you refinish or reface, typically saving 40–70% while extending service life 5–10 years. Prioritize durable finishes and pro prep so the savings hold up under daily wear.
Keep Existing Layout
Why pay to move walls, plumbing, or wiring when the current footprint works? Start with layout optimization: map traffic paths, clearances, and work zones to validate design flow. If corridors meet 36-inch minimums, appliances open without collision, and HVAC runs are efficient, you’re already winning. Reusing infrastructure typically saves 10–25% of project costs and compresses timelines by weeks.
Quantify before you alter. Capture measurements, door swings, and electrical loads. Model variants digitally and score them for circulation efficiency, natural-light reach, and storage density. If a swap of door swing or cabinet depth boosts flow metrics by 15% without requiring any changes to the layout, keep the layout.
Redirect savings to performance upgrades—such as insulation, ventilation, smart controls, and task lighting—and precision-built storage that enhances daily function.
Refinish Over Replace
How much value can you release by refinishing instead of replacing? Start with a cost comparison: cabinet refacing typically runs 40–60% less than full replacement, while countertop resurfacing can save 50–70% versus new stone. You keep sound substrates out of landfills and redirect the budget to performance upgrades.
Leverage refinishing techniques that boost durability and aesthetics: two-part catalyzed paint on cabinets, epoxy topcoats on vanities, and professional tub reglazing with HVLP application. For floors, screen-and-recoat hardwoods to renew sheen at a fraction of sanding costs; for tile, regrout and color-seal to achieve a uniform, water-tight finish.
Prioritize prep—degrease, sand, and prime with bonding primers—to extend lifespan 5–10 years. Replace only hardware, hinges, and fixtures for high-impact touchpoints. Test small areas first to validate adhesion and finish quality.
Room-by-Room Strategies: Kitchen, Bath, and Beyond
Start with the three highest-impact zones—kitchen, bathrooms, and living areas—because they drive 60–80% of resale perception and most utility costs. In the kitchen, align upgrades with kitchen trends that boost function: convert to induction (cuts cooking energy ~10–20%), add LED task lighting (uses ~75% less power), and install a pull-out pantry to reduce food waste by up to 30%. Reface cabinets and swap hardware; reserve splurges for silent, energy-efficient appliances.
In bathrooms, target water and time: WaterSense bath fixtures trim usage ~20–30%. Add thermostatic valves, low-profile storage, and high-CRI mirrors to improve daily usability. Prioritize slip-resistant flooring and proper ventilation to protect finishes.
For living areas, invest in zoning: smart thermostats, dimmable LEDs, and acoustical treatments. Reuse trim; reconfigure layouts before adding square footage.
Material Choices: Durability vs. Design Trends
Although design fads may tempt you, you’ll stretch your budget and reduce lifecycle costs by weighing materials toward durability metrics when selecting materials, then layering trend-forward finishes that are easy and inexpensive to swap. Prioritize substrates with proven wear: porcelain tile (PEI 4–5), quartz or sintered stone with >6 Mohs hardness, and hardwoods rated Janka 1,200+; they outlast fashion. Specify sustainable materials with third-party certifications (FSC, Greenguard Gold, EPD) to cut VOCs and future replacement waste. Choose timeless designs for high-touch surfaces—neutral stone patterns, matte black or brushed metals—then rotate low-cost accents: hardware, paint, lighting shades. In wet zones, they require low water absorption (<0.5%) and sealed edges. Compare the total cost of ownership: warranty length, maintenance hours, and repairability. Spend where failure is expensive; style where updates are cheap.
Labor, DIY, and When to Hire the Pros
Durable materials only pay off if installation matches spec, so assess labor like a line item with risk. Benchmark bids: request itemized scopes, crew size, hours, and warranty terms. Quantify labor considerations: complex work (structural, electrical, plumbing) carries high rework costs—up to 2–3x if corrected later. Calculate your own rate: if your billable time exceeds pro labor, hire out. Validate licenses, insurance, and references; tie payments to milestones and inspection passes.
Reserve DIY tasks for low-risk projects: demo, painting, hardware swaps, and smart device setup. Avoid DIY pitfalls, such as misaligned tile, undercut waterproofing, and code violations, which can void your insurance. Use mockups, laser levels, and manufacturer install guides. For innovation, spec prefabricated panels, click-lock flooring, and modular cabinets to compress labor hours without sacrificing precision.
Phasing Your Project for Cash Flow and Minimal Disruption
Because cash leaves fastest when scope creeps, phase your remodel into discrete, budget-capped packages that align with cash flow and building logic: stabilize (roof, structure, weatherproofing), utilities (rough-in electrical/plumbing/HVAC), envelopes (insulation, drywall, windows), finishes (flooring, cabinets, tile), then punch list. Use a phased approach to lock sequencing, minimize rework, and keep trades moving efficiently. Set not-to-exceed targets per phase and tie progress payments to milestones. Prioritize rooms you must occupy; isolate work zones to limit downtime and relocation costs. Batch inspections to reduce fees and schedule slippage. Order long-lead items early to avoid premium freight. Track unit costs (per square foot, per fixture) and variances weekly. Tight cash management plus disciplined scope gating curbs surprises and preserves optionality for upgrades where ROI is highest.
Financing Options and Cost-Control Tactics
Before demolition dust flies, map how you’ll pay and how you’ll police costs: compare cash, HELOCs (often prime + 0.5–1.5%), cash-out refis (typically lower rates but higher closing costs), unsecured personal loans (fast, higher APR), and 0% intro APR credit cards for short bridge needs. Align term length to project duration; don’t borrow 30 years for a 10-year upgrade horizon. Stress-test payments at +200 bps. Automate guardrails: milestone-based draws, separate project account, and weekly burn-rate reviews.
Deploy cost-saving techniques without eroding quality: lock materials early to avoid price swings, bid at least three contractors, and specify alternates (e.g., quartz tier B vs A). Use unit pricing to curb change orders. Track variance vs baseline weekly. These financing strategies, plus tight controls, keep ROI intact.
Frequently Asked Questions
1. What is the first step in creating a remodeling budget?
The first step is to clearly define the scope of your project and establish your priorities. Start by identifying which areas of your home need the most attention and which upgrades will provide the greatest impact—both for your lifestyle and potential resale value. For example, kitchens and bathrooms often deliver the highest return. From there, separate your “must-haves” from your “nice-to-haves.” This distinction is critical because it gives you flexibility if costs rise. Without a clear scope and priorities, it’s easy for a remodeling budget to spiral out of control due to impulsive upgrades or scope creep.
2. How much contingency should I include in my remodel budget?
A contingency fund is essential for any remodeling project because unexpected issues are almost inevitable. Most experts recommend setting aside 10–20% of your total budget, but the exact amount depends on the age and condition of your home. Older homes, for instance, may hide problems like outdated wiring, plumbing issues, or structural concerns that only become apparent once work begins. A well-planned contingency fund acts as a financial safety net, allowing you to address these surprises without compromising the quality or completion of your project.
3. Where should I splurge during a home remodel?
It’s wise to invest more heavily in elements that provide long-term durability, efficiency, and value. This includes structural improvements, high-quality insulation, energy-efficient windows, and reliable HVAC systems. You should also prioritize areas exposed to moisture—such as bathrooms and kitchens—by investing in proper waterproofing and durable materials. While these upgrades may not always be the most visually exciting, they prevent costly repairs down the line and improve the overall performance of your home. Spending more upfront in these areas often leads to lower maintenance costs and better resale value.
4. Where can I save money without sacrificing quality?
There are several strategic ways to cut costs while still achieving a high-quality result. One of the biggest savings comes from maintaining your existing layout, as moving plumbing, gas lines, or walls can significantly increase expenses. You can also consider refinishing or refacing cabinets instead of replacing them entirely, or choosing mid-range materials that offer durability without the premium price tag. Additionally, taking on simple DIY tasks—such as painting, basic demolition, or installing fixtures—can reduce labor costs. The key is knowing where compromises won’t affect the longevity or safety of your remodel.
5. Why is it important to itemize remodeling costs?
Itemizing your remodeling budget provides clarity and control over your spending. By breaking down costs into detailed categories—such as materials, labor, permits, and design—you gain a clearer understanding of where your money is going. This level of detail makes it easier to compare contractor estimates, identify potential cost overruns early, and make informed decisions if you need to adjust your budget. It also helps prevent hidden expenses from catching you off guard, ensuring that your project stays on track financially from start to finish.
6. Should I hire professionals or DIY parts of my remodel?
Deciding between hiring professionals and doing it yourself depends on the complexity and risk involved in each task. Skilled professionals should always handle critical work such as electrical, plumbing, roofing, and structural modifications, as mistakes in these areas can be dangerous and expensive to fix. On the other hand, homeowners can often take on simpler, low-risk tasks like painting, landscaping, or minor installations. A hybrid approach—where you handle manageable tasks and leave technical work to experts—can help you save money while still ensuring a safe and high-quality outcome.
7. How can I control cash flow during a remodel?
Managing cash flow effectively is key to keeping your project financially stable. One effective strategy is to break the remodel into phases, such as planning, structural work, mechanical systems, and finishing touches. Payments can then be scheduled based on milestones, ensuring that you’re only paying for completed work. This approach not only helps you monitor progress but also prevents large upfront expenses from overwhelming your budget. Maintaining a clear payment schedule and tracking expenses regularly will help you stay in control and avoid financial surprises.
8. What are the biggest factors that impact remodeling costs?
Several key factors can significantly influence the total cost of a remodeling project. Major layout changes—such as moving walls or relocating plumbing—tend to be among the most expensive. Material choices also play a major role, as premium finishes and custom features can quickly drive up costs. Labor is another major component, especially if your project requires specialized trades. Additionally, the age and condition of your home can introduce unforeseen expenses. Understanding these cost drivers in advance allows you to make strategic decisions that align with your budget while still achieving your desired results.
Conclusion
You’ve mapped priorities, priced contingencies, and weighed splurges against smart saves—now stick to the plan. Let data be your compass: cost per square foot, ROI percentages, lifecycle maintenance. Spend where longevity pays (infrastructure, energy efficiency), trim where trends fade (ornate finishes). Phase work to protect cash flow, hire pros when the stakes are high, and track every dollar. Ask yourself, with each decision: will this cost compound value—or merely consume it? Choose the former, relentlessly.