Roof Replacement Timeline: What to Expect, Day by Day
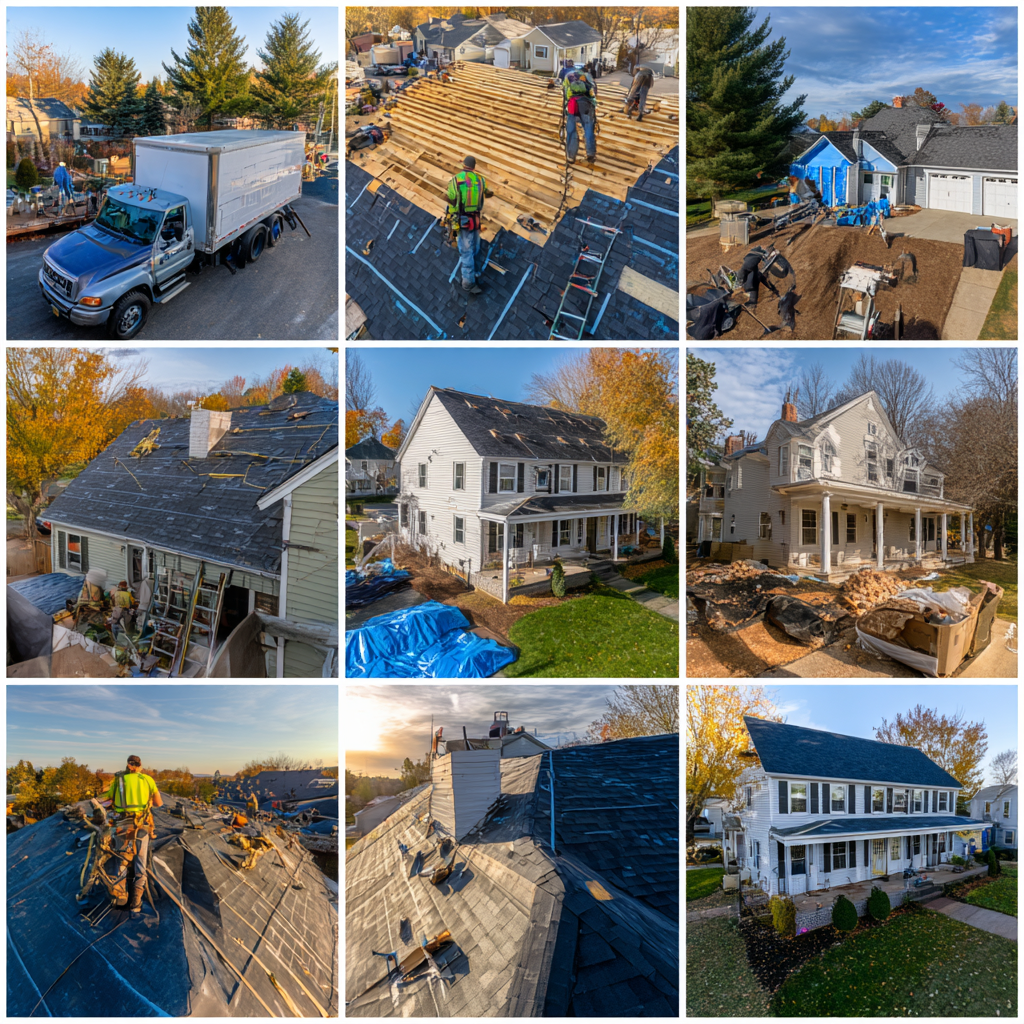
You can expect most roof replacements to take 1–5 working days, depending on the deck condition, pitch, and facets. Day 1 you’ll get a condition check, precise measurements, fall-protection setup, tear-off, debris containment, and code-required dry-in with underlayment and ice-and-water shield. Day 2 crews lock in flashing, valleys, penetrations, and ventilation upgrades. Days 3–4 handle steep areas or sheathing repairs, with daily magnet sweeps. Day 5 covers punch-list, sealants, cleanup, and warranty closeout—keep going to see the full sequence.
Roof Replacement Timeline: Typical 1–5 Days
How long will your roof replacement actually take? You’ll typically see completion in 1–5 days, depending on deck condition, roof complexity, and crew size. Day 1 often covers tear-off, debris containment, and code-compliant fall protection; you’ll get dry-in with underlayment and ice-and-water shielding before crews leave. Day 2 focuses on flashing, valleys, penetrations, and ventilation upgrades to meet manufacturer specs and local code. Day 3–4 can address steep slopes, multiple facets, or sheathing replacement, with daily magnet sweeps and perimeter checks. Day 5 is for the punch-list, final sealant, and cleanup. Factor in weather considerations for wind, rain, and heat. You’ll confirm color options early to avoid material delays.
Day 1: Roof Inspection, Measurements, and Quote
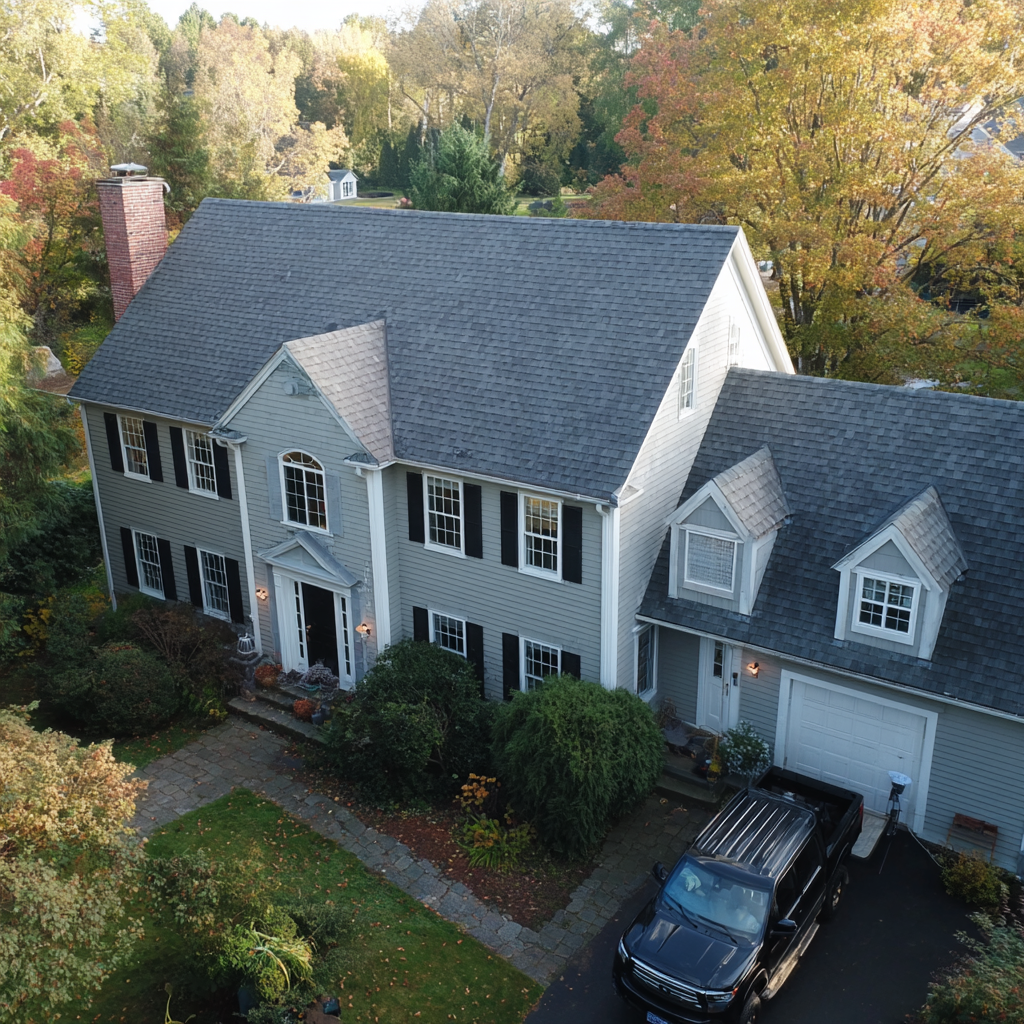
On Day 1, you’ll complete an on-site condition assessment, checking decking integrity, flashing, ventilation, and code-required clearances while following ladder and fall-protection protocols. You’ll take precise roof measurements—squares, pitch, penetrations, and edge details—to size materials and verify compliance with local wind and ice-barrier requirements. You’ll then receive a detailed quote breakdown that itemizes labor, tear-off and disposal, underlayment, flashing, ventilation upgrades, and permit/inspection fees so you can approve a compliant scope.
On-Site Condition Assessment
Before a single shingle gets lifted, Day 1 starts with an on-site condition assessment that verifies what you’ve got, what’s failing, and what the structure can safely support. You’ll get a roof inspection focused on load paths, deck integrity, flashing terminations, ventilation performance, and moisture entry points. Your contractor checks attic staining, fastener pull-through, sagging planes, and soft spots, then documents findings with photos or drone imaging to reduce ladder exposure. You’ll see safety controls: fall protection, anchor planning, electrical clearance, and weather limits.
You’ll also hear code-driven implications—ice-and-water protection zones, drip-edge requirements, fire ratings, and wind-uplift compatibility—so the proposed system matches your on-site condition and local jurisdiction. A scoped quote follows.
Precise Roof Measurements
Once the condition assessment confirms the roof’s limits, your contractor switches to precise measurements that lock the scope, materials, and safety plan to the actual geometry. You’ll see tech-forward methods—drone photogrammetry, laser distance tools, and pitch gauges—validated against on-roof checks to meet code tolerances and manufacturer specs. They map valleys, hips, penetrations, and eave-to-ridge runs so underlayment laps, flashing lengths, and fall-protection anchors align with OSHA and local requirements. They also factor high wind considerations by confirming exposure category, edge lengths, and fastening zones.
- Measure total squares, waste factors, and cut complexity
- Record pitch, ridge/hip linear feet, and drip-edge runs
- Verify chimney, skylight, and pipe-boot dimensions
- Assess intake/exhaust balance for attic ventilation and soffit clearances
Detailed Quote Breakdown
How do those measurements turn into a number you can trust? You’ll see a line-item quote that converts squares, pitch, and penetrations into labor hours, material quantities, and code-required accessories. It should specify the underlayment type, ice-and-water membrane locations, starter course, ridge ventilation, and flashing metals, including gauge and finish.
You’ll verify safety and compliance in the scope: fall-protection plan, deck inspection and replacement rate per sheet, drip-edge per local code, and manufacturer-approved fastening schedule. Ask about waste factors, disposal fees, and permit costs, plus options such as impact-rated shingles or solar-ready flashing. Compare pricing trends across comparable assemblies, not just totals. Finally, confirm contractor qualifications: licensing, insurance limits, certifications, and warranty terms tied to documented installation standards.
Before Install: Permits, Delivery, and Home Prep
Before installation starts, you’ll secure required permits and lock the schedule so the crew can meet local code, inspection, and weather constraints without cutting corners. You’ll also coordinate material delivery, verifying shingle type, underlayment, flashing, and fasteners match the approved scope and manufacturer specs. Finally, you’ll prep the site by clearing access, protecting landscaping and interiors, and designating safe staging and dumpster zones to control fall, trip, and debris hazards.
Permits And Scheduling
When should you lock in permits and the install date so the project stays code-compliant and safe? Start with permit timing: submit as soon as your scope and roof assembly match local code (IBC/IRC, wind, fire, and ventilation). Don’t set a firm start until the AHJ confirms review windows and inspection requirements.
- Verify contractor licensing, insurance, and pull-the-permit responsibility in writing.
- Align inspection checkpoints (tear-off, decking, final) with your crew’s daily plan.
- Preempt scheduling conflicts by choosing a weather buffer and a backup date.
- Confirm site safety controls: fall protection plan, OSHA-compliant ladders, and debris containment.
You’ll reduce rework, avoid stop-work orders, and keep the critical path predictable and safe.
Material Delivery And Prep
A smooth roof replacement starts with staging the right materials and prepping your site so the crew can work safely and stay within code. You’ll confirm delivery windows, verify quantities, and keep bundles off soft lawns using pallets or dunnage. Demand proper material handling: lift with forklifts or conveyor systems, secure loads, and block access under drop zones.
You’ll clear driveways for dump trailers, mark septic and irrigation lines, and protect HVAC units with breathable covers. Set dedicated circuits for chargers and saws, and keep cords GFCI-protected. Require tool maintenance checks: sharp blades, guarded cutters, calibrated nailers, and inspected ladders that meet OSHA duty ratings. Post no-parking signage, brief occupants on noise and debris, and confirm dumpster placement follows local setback and fire-lane rules.
Install Day: Tear-Off and Debris Haul-Away
On installation day, the crew begins by protecting landscaping and setting up a controlled debris zone that meets local ordinances and site safety requirements. You’ll see barriers, signage, and magnet sweeps staged to reduce trip hazards and nail exposure. To manage tear-off concerns, they remove roofing in measured sections, maintain a stable footing, and keep fall-protection tied off per OSHA and manufacturer specs. Your contractor coordinates debris haulaway logistics by placing lined dumpsters on approved surfaces, scheduling pulls to prevent overfill, and documenting disposal for compliance. Expect constant communication via app updates and photo logs so you can track progress without entering the work zone.
- Verify utility clearances and access routes.
- Confirm dumpster placement and weight limits.
- Enforce PPE, ladder angles, and tie-off points.
- Run final ground sweep before demobilization.
Install Day: Decking Repairs and Roof Prep
After the tear-off, how do you know the roof’s ready for new materials? You start with a full deck inspection, scanning for soft spots, delamination, rot at eaves, and fastener pull-through. Your crew checks attic ventilation openings and confirms the deck meets local code thickness and span ratings. Any compromised panels are cut back to sound framing and replaced with matching sheathing; you’ll see ring-shank nails or approved screws installed at the required spacing for uplift resistance. Next, come repairs to the decking around penetrations and valleys to restore a flat, continuous plane. For roof prep, you verify drip-edge backing, align starter lines, and clean dust so adhesion and sealants perform as engineered. You also confirm fall protection anchors and keep the work zone dry.
Install Day: Underlayment, Flashing, and Shingles
With the deck repaired, flat, and dry, your crew can start installing the roofing system components that provide water-shedding and wind resistance. You’ll see a sequenced build that meets manufacturer specs and local code, including proper fall protection and controlled material staging.
- Dial in underlayment selection: synthetic for high tear strength, or self-adhered membrane at eaves/valleys to satisfy ice-barrier requirements.
- Lock in a precise flashing technique: step flashing at walls, apron flashing at chimneys, and correctly lapped drip edge to direct runoff.
- Install starter and shingles: align to chalk lines, follow required exposure, and use the correct nail count, placement, and depth for rated uplift.
- Seal critical zones: cap ridges with compatible ventilation, and hand-seal in cold or steep areas.
Final Step: Cleanup, Walkthrough, and Warranties
How do you know the job’s truly finished? You’ll see a controlled teardown of staging, fall-protection retrieval, and a systematic sweep that meets OSHA housekeeping expectations. Watch the cleanup crew dynamics: one tech magnet-rolls for fasteners, another verifies gutters and downspouts stay clear, and a lead confirms debris separation for proper disposal. You should receive photos or drone captures confirming that ridge caps, flashings, and penetrations meet manufacturer specs and local code. During the walkthrough, you’ll validate ventilation path continuity, drip-edge alignment, and sealant cure conditions. Then you’ll review warranty language: coverage term, transferability, exclusions (storm, foot traffic), and required maintenance. You’ll get the permit closeout docs, the final invoice, and the emergency contact steps.
Conclusion
Like Theseus navigating the labyrinth, you’ll move through a roof replacement with a clear path: verified measurements, permitted work, and staged deliveries. You’ll watch crews follow OSHA fall-protection requirements and local codes—tear-off, deck repairs, underlayment, flashing, and shingle installation—each step inspected and documented. You won’t just get a new roof; you’ll get a safer envelope. Before you sign off, you’ll complete the walkthrough, confirm ventilation, and secure warranty paperwork.
Frequently Asked Questions
Here are 10 highly practical, SEO-optimized FAQs written in a reassuring, clear tone. They are tailored specifically to the scheduling, weather dependencies, and logistical phases of a professional roof replacement based on the timeline considerations homeowners face.
1. How long does the actual, physical installation of a new roof take?
For a standard single-family home, the active tear-off and installation process typically takes just 1 to 3 days. However, this depends heavily on your roof’s size, pitch (steepness), and the complexity of the architectural lines (valleys, dormers, and vents). A massive home with steep peaks or complex slate accents can extend the timeline to a week or more.
2. If the physical build only takes a few days, why does the entire process feel longer?
The physical labor is just the middle phase of a longer timeline. A complete roof replacement timeline actually spans 3 to 6 weeks when you factor in pre-construction and post-construction steps:
- Phase 1: Pre-Construction (2–4 weeks): Securing municipal building permits, ordering specific shingle or metal components, and scheduling the material delivery.
- Phase 2: Active Construction (1–3 days): Demolition, structural repair, waterproofing, and shingle installation.
- Phase 3: Wrap-Up (1–2 days): Thorough site cleanup, magnetic sweep for stray nails, and final municipal inspection sign-offs.
3. How does weather impact a roofing schedule, and what happens if it rains?
Roofing is entirely at the mercy of Mother Nature. A professional crew will closely monitor local forecasts and will not rip off your old shingles if there is a realistic threat of rain or heavy winds. If unexpected weather strikes mid-project, the crew will immediately halt installation and completely dry-in the exposed roof using heavy-duty synthetic underlayments or structural tarps to prevent water from penetrating your attic space.
4. Can you replace a roof during the freezing New England winter months?
While it is technically possible, it is highly discouraged. Standard asphalt shingles rely on ambient sunlight to activate their self-sealing adhesive strips. If installed in freezing temperatures, the shingles won’t seal properly, making them highly vulnerable to blowing off during high winter winds. Furthermore, freezing temperatures make asphalt shingles brittle and prone to cracking when struck by a carpenter’s pneumatic nail gun. Late spring through early autumn is the ideal roofing window.
5. What is a “material drop,” and when does it happen in the timeline?
A material drop is the delivery of all your new roofing components (shingles, underlayment, flashing, ice and water shields) to your property. This usually happens 24 to 48 hours before the active construction crew arrives. The delivery truck will use a hydraulic crane to drop the heavy pallets directly onto your roof deck or place them carefully in your driveway. You will need to keep your driveway completely clear during this window.
6. Why is the “tear-off” phase considered the most critical part of the schedule?
Some cut-rate contractors try to save time by nailing new shingles directly over old, failing shingles (called a “recover”). A quality builder always performs a full tear-off down to the bare wood deck. Ripping away the old materials allows the team to thoroughly inspect the underlying plywood sheets for hidden water damage, sagging joists, or wood rot that must be cut out and replaced before the new roofing system is laid down.
7. What steps should I take to prepare my home before the roofing crew arrives?
Because a roof replacement causes massive vibrations throughout the structure of your home, you should take a few indoor and outdoor precautions the night before:
- Indoors: Remove fragile items, mirrors, or loose picture frames from top-floor walls so they don’t shake loose and fall. Cover items in your attic with old sheets to catch any falling sawdust.
- Outdoors: Move cars, patio furniture, grills, and potted plants away from the house’s perimeter to protect them from falling debris.
8. How do roofing crews protect my landscaping and lawn during a teardown?
Tearing off thousands of pounds of old shingles creates a massive amount of falling debris. To protect your property, a professional crew will drape heavy-duty tarps or specialized netting from your gutters down to the lawn, creating a structural slide that protects your siding, window screens, and landscaping bushes. They will also position a large roll-off dumpster directly beneath the main roof slope to catch the bulk of the waste.
9. What happens during the final cleanup and “magnetic sweep”?
Once the new shingles are securely nailed down, the crew shifts entirely to property cleanup. They will pick up large debris by hand, rake your lawn to catch stray shingle granules, and drag a high-powered, industrial magnetic bar across your entire lawn, landscaping beds, and driveway. This magnetic sweep is done multiple times to capture hidden metal nails and staples, ensuring your property is safe for children, pets, and car tires.
10. When do town building inspections occur during the replacement timeline?
Building code inspections are legally required to verify the roof is structurally sound and safely waterproofed. Depending on your local town regulations, inspections typically happen at two key junctures:
- The Mid-Point Inspection: An inspector verifies the bare wood deck has been properly repaired and that the mandatory ice-and-water shield is installed correctly along the roof edges.
- The Final Inspection: Occurs a day or two after completion to verify the final shingles, ridge vents, and flashing elements meet strict local building safety codes.