Trim, Wainscoting & Crown: Easy Millwork Upgrades With Big Impact
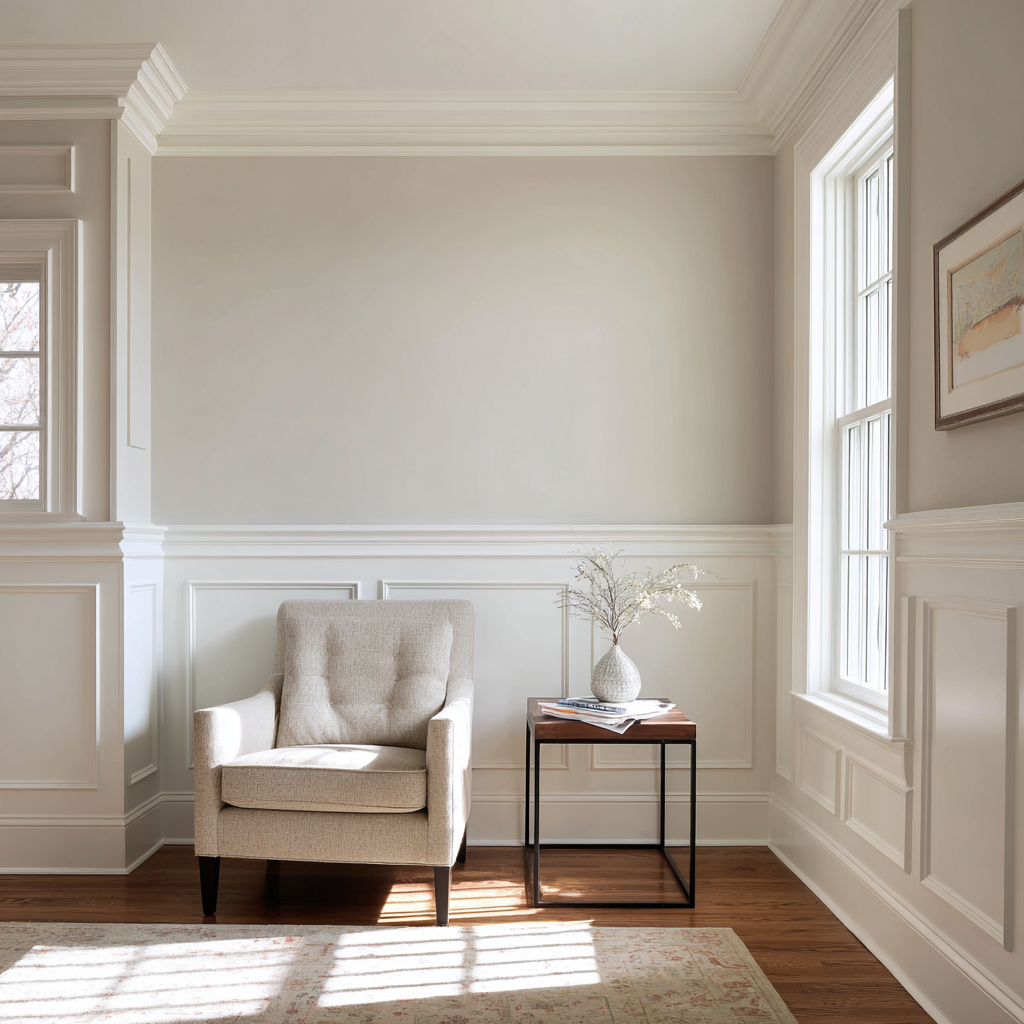
Upgrade a flat room fast by beefing up trim, wainscoting, and crown. You’ll match stile/rail proportions, dial in reveals, and use rabbets for tight panel registration. Swap in taller baseboards and wider casings, then run a laser line and story pole for dead‑even wainscot rails and panels. Choose crown projection to “raise” or compress ceiling height. Finish with back‑primed MDF, clean caulk beads, and enamel topcoats so every profile trick starts to make sense.
Understanding Key Millwork Terms and Profiles
Before you start specifying millwork upgrades, you need to speak the same language as the shop drawings: terms like stile, rail, reveal, rabbet, nosing, and scribe define how profiles are cut, joined, and installed. You read a stile as the vertical member, rail as the horizontal, and you use the reveal to control shadow lines and depth between intersecting millwork styles.
A rabbet isn’t decorative; it’s a precision notch that sets how panels register and how trim materials overlap. Nosing drives both code‑compliant projection and the visual line on stairs and ledges. You run a scribe strip to cheat imperfect walls, keeping joints tight without over‑caulking. Once you command these fundamentals, you can confidently mix profiles, scale, and sections to prototype bolder, custom assemblies.
Choosing Trim Styles That Match Your Home’s Architecture
You’ll start by reading your home’s era the way a finish carpenter does—studying window proportions, ceiling height, and existing casing or crown profiles for stylistic cues. From there, you’ll match trim profiles and reveal dimensions so the head, jamb, and baseboard all hold the correct visual weight for the architecture, whether it’s Craftsman, Colonial, or Mid-Century. You’ll also tune proportions—stack heights, projection, and margin lines—so every run of trim looks intentional, not like an off-the-shelf mismatch.
Reading Your Home’s Era
Most houses telegraph their era through proportions, profiles, and joinery details, and your trim package should decode and echo that language. Start by reading the shell: window head height, casing reveal, and baseboard height all hint at historical influences and architectural styles. Check original jambs, plinths, and any surviving backband for era‑specific cues.
Scan for clues in the stair: newel scale, baluster spacing, and handrail profile often predate later remodels. Look at door layouts—is it a five‑panel Craftsman, a flat‑slab Mid‑Century, or a raised‑panel Colonial revival? Each points to a different molding vocabulary.
Document what you see: snap photos, trace profiles, note dimensions. That on‑site field survey becomes your trim “spec book” for era‑correct upgrades.
Matching Profiles and Proportions
Once you’ve read the house, the next step is to select profiles and proportions that actually track with its architecture instead of fighting it. You’re after matching styles, but with sharp proportion considerations so the casing, base, and crown read as one intentional envelope.
Think in sections and ratios, not just looks:
- Size casing at roughly 1/16–1/12 of ceiling height for balanced sightlines.
- Keep baseboard taller than casing width so the room doesn’t feel “top‑heavy.”
- Scale crown depth to at least the casing width; under‑scaled crown looks like afterthought trim.
- Align wainscot cap and sill profiles with your window stool or rail for a continuous datum.
- Use one primary profile family, then modify reveals and build‑ups for hierarchy without visual noise.
Simple Baseboard and Casing Upgrades With Maximum Effect
You can get a big visual upgrade just by rethinking your baseboard profiles and door casings, without touching the rest of the trim package. Start by selecting taller baseboards with a crisp reveal or eased edge that suit your wall height, then detail your outside/inside corners, returns, and changes for tight, clean lines. Pair that with wider, properly proportioned door casings—using backband, plinth blocks, or a simple head detail—to frame openings with more presence and a finished, custom look.
Choosing Baseboard Profiles
Ever wonder why some rooms feel finished and others look bare, even with fresh paint and nice furniture? Often it’s the baseboard profile doing the quiet heavy lifting. When you dial in baseboard materials and baseboard heights, the whole envelope reads more intentional and custom.
Think regarding proportion, not just style label. A clean square edge in a 3¼” height can feel anemic in a tall volume, while a 5½” stepped or eased‑ogee profile anchors the plane.
- Match profile scale to ceiling height and room span
- Use denser baseboard materials for crisper shadow lines
- Favor eased edges where vacuums and mops hit frequently
- Align reveal and profile language with existing window trim
- Prototype with a short, painted mockup before committing
Upgrading Door Casings
Few finish upgrades pull more visual weight per dollar than tightening up your door casings. Start by standardizing door casing styles so sightlines feel intentional, not builder‑grade random. Bump up to 3½”–4¼” stock for more reveal, then run crisp 1/8″ margins to the jamb for a tight, modern read.
For decorative casing options, consider a two‑piece build‑up: flat stock with a backband, or a square leg with a mitered or plinth‑overhead head casing. Use pocket‑screwed jamb extensions to flush out proud drywall and kill shadow gaps. Scribe legs to out‑of‑plane floors instead of caulking wide joints. Pre‑finish, then cope inside corners where casing dies into adjacent trim, keeping profiles razor‑clean and install time efficient.
Wainscoting Ideas for Every Room and Budget
Some of the most impactful millwork upgrades rely on well‑designed wainscoting, tailored to the room’s proportions, traffic patterns, and budget constraints. You can push modern wainscoting designs well beyond traditional raised panels by playing with module size, reveal depth, and shadow lines, while still leaning on budget friendly materials like MDF, primed finger‑joint, and ply with applied stiles.
- Use a laser line to keep rail heights consistent across out‑of‑square walls.
- Run a story pole to lock in panel spacing before you cut a single stick.
- Break long walls with faux “pilasters” to avoid awkward skinny panels.
- Scribe bottom rails tight to wavy floors, then caulk only tiny gaps.
- Pre‑assemble panel sections on the bench for cleaner joints and faster installs.
Crown Molding Tricks to Visually Raise or Balance Ceilings
When a room feels squat or out of proportion, you can use crown profiles and layout tricks to cheat the eye and “raise” or rebalance the ceiling. Start by matching crown molding styles to the perceived, not actual, ceiling height. On low ceilings, specify a shallow projection with a tall wall leg and run the crown 1–2″ down from the lid, painting the gap ceiling color to visually “float” the corner.
For tall ceilings, stack a base cap over a standard crown and add a frieze band below to compress the shift. Use high-contrast paint on the wall band and keep the crown and ceiling unified in color. On sloped or uneven lids, feather profiles and align to a laser datum, not the drywall.
Planning, Measuring, and Layout Tips for DIY Installation
Although millwork looks forgiving on the wall, a clean install starts long before you pick up a nail gun; it starts with disciplined planning, accurate measuring, and a tight layout. You’re not just hanging sticks—you’re building a precise grid that has to reconcile crooked walls, out‑of‑square corners, and varying ceiling heights.
- Snap reference lines with a laser level and confirm with a 6′ or 8′ spirit level.
- Pull measurements twice, then “story‑stick” them onto a scrap to expose hidden installation challenges.
- Dry‑fit long runs, checking reveals at doors, windows, and casings before cutting returns.
- Use tool recommendations like a digital angle finder, track saw, and pin nailer to boost accuracy.
- Lay out wainscoting modules from centerlines, not corners, to avoid tapered panels.
Finishing Touches: Caulking, Painting, and Seamless Transitions
Once the last piece of trim is nailed off, the real polish comes from tight caulk lines, disciplined paint prep, and clean shifts into adjacent surfaces. Run a test bead to dial in your caulking techniques: consistent trigger pull, 45° nozzle, and a shallow bead that just bridges the gap. Tool with a damp finger or silicone profiler; don’t flood the profile.
Back‑prime raw MDF edges, then sand, vacuum, and tack‑cloth before finish. Choose paint types strategically: enamel trim paint for durability, matte or eggshell on walls to keep profiles reading crisp. Cut sharp lines with a high‑angle sash brush and low‑tack tape, pulling tape while the paint’s still green to avoid bridging and ragged changes.
Frequently Asked Questions
1. What are millwork upgrades, and why do they make such a big impact?
Millwork upgrades—like trim, wainscoting, and crown molding—are architectural details that add depth, structure, and visual interest to otherwise flat walls. Even though they don’t change the layout of a room, they dramatically affect how finished and intentional a space feels. By adjusting proportions, profiles, and shadow lines, these elements can make a basic room feel custom-built rather than “builder grade.” Simple upgrades such as taller baseboards or wider casings can transform the overall aesthetic without requiring a full renovation, making millwork one of the highest-impact, cost-effective improvements you can make.
2. What basic millwork terms should homeowners understand before starting?
Before planning any millwork project, it’s important to understand key terminology so you can communicate clearly with contractors or follow design plans accurately. Terms like stiles (vertical elements), rails (horizontal elements), and reveals (the small gaps that create shadow lines) define how trim is structured and installed. A rabbet refers to a notch that helps panels fit precisely, while a scribe allows trim to fit tightly against uneven walls. These details aren’t just technical—they directly influence how clean and professional the finished product looks. Mastering these basics gives you more control over design decisions and helps avoid costly mistakes during installation.
3. How do you choose trim styles that match your home’s architecture?
The key to choosing the right trim is to “read” your home’s architectural style and match its proportions and details. This means studying elements like window heights, door styles, and existing trim profiles to identify whether your home leans Craftsman, Colonial, Mid-Century, or another style. Once you understand the architectural language, you can select trim profiles that align with it—ensuring everything feels cohesive rather than mismatched. Proper proportions are equally important; for example, casing width, baseboard height, and crown size should all relate to ceiling height and room scale. When done correctly, the trim feels original to the home instead of like an afterthought.
4. What simple trim upgrades deliver the biggest visual improvement?
Some of the most effective upgrades are also the simplest. Increasing baseboard height and using wider door and window casings can instantly make a room feel more refined and substantial. These changes create stronger visual framing and cleaner shadow lines, which help define the room’s structure. Even without adding crown molding or wall panels, upgrading these foundational elements can significantly elevate the look of a space. The key is consistency—keeping proportions and styles aligned across all trim elements so the design feels intentional throughout the home.
5. What are the best wainscoting ideas for different budgets?
Wainscoting can be customized to fit nearly any budget, from simple applied trim designs to more elaborate panel systems. Budget-friendly options often use materials like MDF or plywood with applied stiles to create the look of traditional paneling without the high cost. More advanced designs can play with panel size, spacing, and depth to create modern or classic looks. Regardless of budget, careful planning is essential—using tools like laser levels and story poles ensures consistent spacing and alignment, which is what ultimately makes the installation look professional. Thoughtful layout matters more than expensive materials in achieving a high-end result.
6. How can crown molding change the perception of ceiling height?
Crown molding isn’t just decorative—it can visually alter how a room’s proportions are perceived. For lower ceilings, using a shallower crown profile and positioning it slightly below the ceiling (with the gap painted the same color as the ceiling) can create the illusion of added height. In rooms with taller ceilings, larger or stacked crown profiles can help balance the vertical space and prevent the room from feeling too expansive or empty. By carefully choosing the size, placement, and color treatment of crown molding, you can “cheat” the eye and make a room feel more balanced and comfortable.
7. What planning and layout steps are critical for a successful DIY installation?
Successful millwork installation depends heavily on planning and precision. Before cutting or installing anything, it’s essential to establish reference lines using tools like laser levels and to double-check all measurements. Creating a “story pole” (a physical reference stick marked with key dimensions) can help maintain consistent spacing and reveal potential layout issues early. Dry-fitting pieces before final installation ensures proper alignment, especially around doors, windows, and corners. Because walls and floors are rarely perfectly straight, techniques like scribing help achieve tight, seamless fits that look professional rather than patched together.
8. What finishing techniques make millwork look high-end?
The final finish is what separates average work from a truly polished result. Proper caulking techniques—using small, consistent beads and smoothing them cleanly—help eliminate visible gaps without making trim look overfilled. Back-priming materials like MDF prevents moisture issues and ensures even paint coverage. Using durable enamel paint on trim creates a smooth, long-lasting finish that resists wear, while careful taping and brushwork produce crisp, sharp lines. These finishing touches may seem minor, but they are essential for achieving a seamless, professional appearance that makes the entire project look custom-built.
Conclusion
With the right profiles, reveals, and proportions, you’re not just adding trim—you’re pulling a crisp plumb line through the whole house. When you read your walls, snap accurate layout lines, and scribe tight to out‑of‑square corners, every joint, cope, and return looks intentional. Dial in your caulk beads, mil thickness, and sheens, and your millwork stops looking like add‑ons and starts reading as original, architect‑grade detail.