The Ultimate Mudroom Masterpiece: Custom Carpentry Secrets for New England Winters
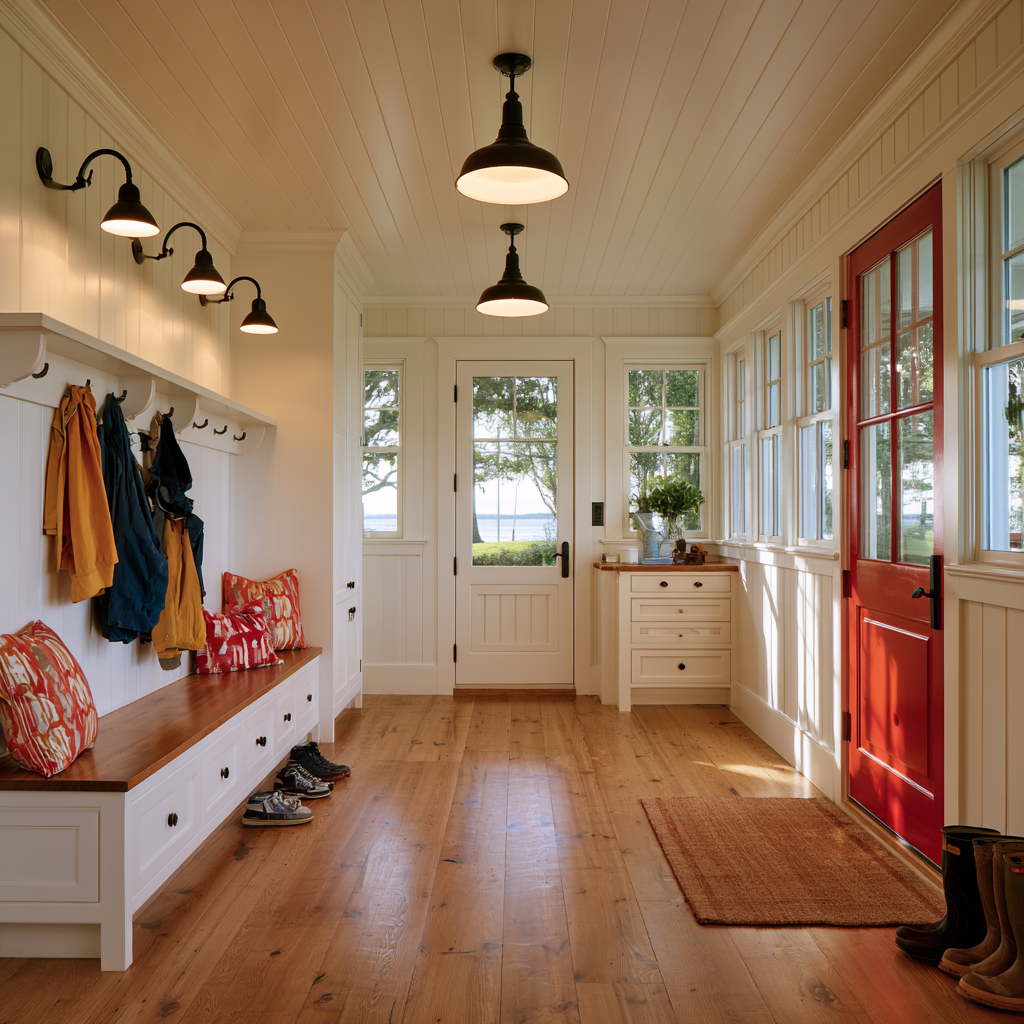
Turn your mudroom into a New England winter command center by mapping moisture zones from the threshold to boot storage, then directing meltwater into sloped trays or trench drains. Use vertical cubbies, ventilated lockers, and a durable bench with concealed storage and boot-drying vents. Specify sealed plywood, marine-grade materials, corrosion-resistant fasteners, washable wall protection, and flexible finishes. Add scribed trim, resilient transitions, and proper ventilation. Continue for practical planning and cost guidance.
Map Traffic, Storage, and Moisture Zones
Start by mapping how people, gear, and moisture move through the mudroom during a typical New England winter. Track each arrival: boots enter first, coats shed next, and wet gloves, hats, and dog towels follow. Use this map traffic study to identify collisions, bottlenecks, and surfaces that need rapid drainage. Mark moisture zones at the threshold, beneath boot storage, beside the bench, and near exterior doors. Then assign durable finishes and ventilation to each zone. Porcelain tile, sloped drip trays, and removable grates can contain meltwater without slowing circulation. Position hooks and cubbies along the natural sequence from entry to exit, keeping frequently used equipment within one efficient reach. Add sensors or visual indicators to flag standing water before it damages woodwork, flooring, or stored gear during severe storms.
Adapt Custom Mudroom Storage to Small Spaces
You’ll maximize vertical storage with sealed, adjustable cubbies that keep boots, coats, and wet gear off the floor. Build a multi-use bench with a moisture-resistant seat, concealed storage, and space for drying footwear. Customize every corner with narrow drawers, hooks, and angled shelving to preserve clear passage during stormy New England weather.
Maximize Vertical Storage
When floor space is limited, build upward with custom cubbies, overhead cabinets, and narrow shelving that keeps winter gear organized without blocking the walkway. Start with durable, moisture-resistant plywood or sealed hardwood to withstand wet boots, salt, and slush. Place daily-use hooks at shoulder height, then reserve higher compartments for seasonal coats, spare gloves, and rarely used accessories. Adjustable shelves let you refine dimensions as your household’s needs change, while labeled bins prevent hidden clutter. Consider ventilated doors or perforated panels so damp gear can dry without trapping condensation. These maximize vertical storage ideas without sacrificing circulation or visibility. With thoughtful vertical stacking strategies, you’ll use every inch efficiently: install a slim shelf above hooks, corner towers beside the entry, and ceiling-height cabinets with secure, reachable hardware.
Build Multi-Use Benches
A multi-use bench gives a compact mudroom a durable place to sit, store footwear, and contain winter gear. Specify a hinged top with soft-close hardware, or install pullout drawers sized for boots, gloves, and snow pants. Add a slatted lower shelf to promote airflow, reducing trapped moisture and odors after storms. Choose sealed hardwood, marine-grade plywood, or moisture-resistant laminate; precise material sourcing matters when salt, grit, and wet footwear will share the space. During design timing, coordinate bench height with wall hooks and nearby door swings, preserving a clear passage. Set the seat at roughly 18 inches high and reinforce its frame for daily loading. A removable drip tray beneath footwear simplifies cleanup, while concealed ventilation slots protect stored gear without sacrificing the bench’s clean, compact profile.
Customize Every Corner
With the bench handling seating and footwear, custom storage can capture every remaining inch without narrowing the passage. You can fit shallow cubbies beneath stairs, recessed cabinets between studs, and tall lockers beside the entry door. Specify adjustable shelves for boots, gloves, helmets, and changing seasonal gear; ventilated panels let damp items dry before mildew develops. A narrow pullout can hold umbrellas, snow shovels, or dog leashes without cluttering the floor. Ask your carpenter to scribe each cabinet tightly to uneven walls and seal exposed edges against melting snow. Choose marine-grade finishes, corrosion-resistant hardware, and a custom finish that complements your home’s interior. With thoughtful dimensions and winter durability in mind, you’ll transform awkward corners into organized, accessible storage while preserving clear circulation and dependable performance through every nor’easter.
Design Cubbies, Benches, and Boot-Drying Areas
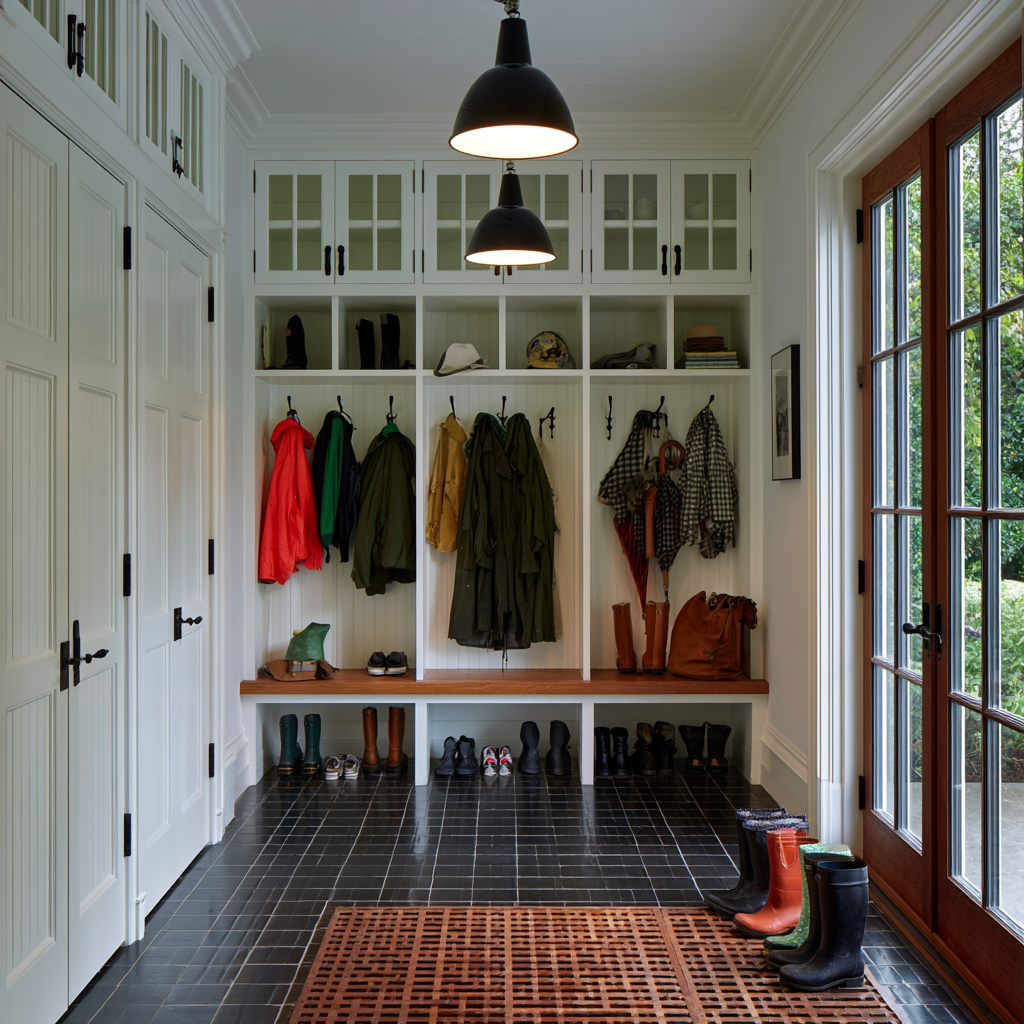
You’ll keep winter gear organized with custom cubbies and sturdy hooks sized for coats, boots, and wet layers. Add a moisture-resistant bench with integrated boot dryers to warm footwear without trapping heat or dampness. Position vents for even airflow, and use sealed, durable finishes that withstand New England slush and salt.
Custom Cubbies and Hooks
Where should winter gear go when every inch of your mudroom must earn its keep? Start with custom cubbies sized for your household’s actual needs. Assign each person a labeled compartment, then reserve upper shelves for hats, gloves, and scarves. Adjustable dividers let you reconfigure storage as children grow or gear changes. For hooks organization, install staggered, heavy-duty pegs at adult and child heights; use corrosion-resistant hardware that withstands damp coats and salty air. Add a narrow shelf above each hook row for helmets, leashes, or folded layers, keeping frequently used items visible and accessible. Choose sealed hardwood, moisture-resistant plywood, or durable laminate, and specify rounded edges for safer traffic flow. Thoughtful ventilation gaps help wet accessories dry without trapping moisture inside each cubby.
Benches With Boot Dryers
A built-in bench turns the mudroom’s lower wall into hardworking storage and a practical place to pull off wet boots. Choose benches with boot d dryers that circulate gentle, filtered air through slotted shelves, drying footwear without overheating leather, rubber, or adhesives. Position vents beneath each pair, and add a timer or humidity sensor so the system runs only when necessary. Specify sealed hardwood, marine-grade plywood, and moisture control finishes to resist salt, slush, and repeated cleaning. Keep the seat deep enough for comfortable use, but preserve a clear walkway for coats and gear. Vent the cabinet toward a conditioned space, not an exterior wall, where freezing temperatures can damage components. Include removable drip trays, washable grilles, and dedicated outlets with ground-fault protection. Your bench becomes a precise winter recovery station.
Choose Moisture-Resistant Finishes for Winter
When winter brings slush, road salt, and meltwater into your mudroom, choose finishes that resist moisture without sacrificing the character of custom carpentry. Specify moisture resistant finishes matched to each material’s porosity and movement. On hardwood benches and cabinetry, a penetrating water-repellent oil preserves grain while allowing straightforward touch-ups. For painted trim, ask your carpenter for a flexible, low-VOC enamel that seals end grain and resists repeated damp-to-dry cycles. Winter proof coatings work best when applied to properly acclimated, dust-free surfaces, with special attention to joints and exposed edges. Consider advanced waterborne polyurethane for a clear, durable barrier that won’t yellow under changing daylight. Your finisher should confirm cure times before heavy winter use, because cold, humid conditions can slow hardening and compromise adhesion.
Add Details That Protect Floors and Walls
Protect floors and walls with details that intercept water, salt, and grit before they spread through the mudroom. Specify a recessed entry mat well with a removable, commercial-grade grate, then surround it with sealed tile or stone that tolerates freeze-thaw cycles. Add a narrow trench drain where wet boots collect, sloping the surface precisely toward its outlet. Install a durable bench drip edge and a boot tray with raised ribs to keep footwear above meltwater. On walls, extend a washable tile wainscot behind hooks and seating; cap it with a sloped ledge that sheds droplets instead of trapping them. Use moisture barriers behind tile, corrosion-resistant fasteners, and protective finishes on exposed wood. Choose closed-cell cushions and removable covers, so you can clean salt quickly and prevent staining, swelling, and winter odors.
Estimate Custom Mudroom Carpentry Costs
Estimate custom mudroom carpentry costs by separating cabinetry, seating, trim, hardware, finishes, and installation rather than relying on a single square-foot figure. Build a weather-ready estimate around:
- Cabinet boxes and moisture-resistant doors
- Bench framing, cushions, and boot trays
- Wall protection, trim, and durable flooring transitions
- Hooks, vents, lighting, and specialty hardware
– Finishes, delivery, and installation labor
Compare regional pricing benchmarks, then adjust for your layout, joinery, and winter demands. Material sourcing affects both cost and performance: locally milled hardwood may reduce freight, while sealed plywood and corrosion-resistant fasteners protect against wet coats, salt, and melting snow. Request itemized bids with allowances for hidden framing repairs and electrical changes. Confirm whether contractors include design time, permits, disposal, and final sealing. A digital moisture sensor, heated drawer, or ventilated cabinet can raise upfront costs while improving longevity and daily comfort.
Frequently Asked Questions
How Long Does a Custom Mudroom Carpentry Project Typically Take?
A custom mudroom carpentry project typically takes four to eight weeks from design approval through installation. You’ll spend one to two weeks finalizing plans, followed by timing considerations involving permits, contractor availability, and site measurements. Material sourcing may add two to four weeks, especially for specialty hardware, durable flooring, or regionally milled lumber. Weather can delay exterior work, so schedule around freezing temperatures and storms. A complex, highly customized mudroom may require additional weeks.
Which Permits Might Be Required for a Mudroom Renovation?
You might need building, electrical, plumbing, mechanical, or zoning permits, depending on your mudroom’s scope and location. Confirm permit considerations with your municipality before demolition, especially if you’re adding windows, altering structure, insulating exterior walls, or extending the footprint. Coordinate utility markings and utility coordination before excavation or trenching. You’ll also need inspections at specified stages. Account for snow loads, frost depth, drainage, and weather delays so approvals support a durable, code-compliant renovation.
Can Existing Electrical Outlets and Lighting Be Incorporated Into the Design?
Yes, you can incorporate existing outlets and lighting into your mudroom design, provided they meet current electrical requirements. Strategically incorporating outlets keeps appliances accessible while protecting connections from moisture, snow, and impact. Lighting integration can preserve existing fixtures or coordinate upgraded LEDs with storage, benches, and entry paths. You’ll want a licensed electrician to inspect wiring, confirm GFCI protection, and relocate devices if new cabinetry, insulation, or weather-sealing changes clearances.
How Should a Mudroom Be Ventilated to Prevent Lingering Odors?
You should ventilate your mudroom with controlled exhaust, not rely on an open window alone. That theory matters: winter air exchange removes odors, but uncontrolled drafts waste heat and invite moisture. Install a quiet, humidity-sensing exhaust fan near boot storage, and provide makeup air beneath the door. Pair these ventilation strategies with washable surfaces, drying racks, and sealed bins for effective odor management. Insulate ductwork and vent outdoors, never into wall cavities.
What Maintenance Schedule Keeps Custom Mudroom Cabinetry Looking Its Best?
Follow a maintenance schedule: wipe cabinetry weekly, inspect surface finishes monthly, and deep-clean plus reseal annually. After installation timeline completion, confirm permit requirements before altering built-ins. Check electrical integration, test outlets, and verify lighting placement quarterly. Review ventilation strategies each season, clean filters, and monitor odor control, especially during wet New England weather. You’ll preserve joinery by drying spills immediately, tightening hardware twice yearly, and addressing swelling before freezing temperatures worsen damage.
Conclusion
With thoughtful planning, your mudroom can outsmart New England winter instead of surrendering to it. Map traffic, tailor storage to every awkward inch, and give wet boots a proper drying station—because puddles shouldn’t qualify as interior décor. Choose durable finishes, shield floors and walls, and budget honestly for custom carpentry. Then you’ll have a hardworking entry that contains coats, snow, and seasonal chaos, leaving your home impressively dry—and your family’s excuses for muddy footprints nowhere to hide.